.NET Core ver1.0.1プロジェクトを、ver1.1.0に上げるには?
現在、Visual Studio 2015 Update3 で作られる ASP.NET Core テンプレートプロジェクトの.NET Coreバージョンは 1.0.1 です。
これまでで linux / macともに .NET Core ver1.0.1 / 1.1.0 の二つをインストールしましたので、プロジェクトのバージョンを上げてみます。
.NET Coreのバージョン確認
ASP.NET Coreプロジェクトの.NET Coreバージョンは、project.jsonに書かれています。
テンプレート状態はこちら。
{
  "dependencies": {
    "Microsoft.NETCore.App": {
      "version": "1.0.1",
      "type": "platform"
    },
    "Microsoft.AspNetCore.Diagnostics": "1.0.0",
    "Microsoft.AspNetCore.Mvc": "1.0.1",
    "Microsoft.AspNetCore.Razor.Tools": {
      "version": "1.0.0-preview2-final",
      "type": "build"
    },
    "Microsoft.AspNetCore.Routing": "1.0.1",
    "Microsoft.AspNetCore.Server.IISIntegration": "1.0.0",
    "Microsoft.AspNetCore.Server.Kestrel": "1.0.1",
    "Microsoft.AspNetCore.StaticFiles": "1.0.0",
    "Microsoft.Extensions.Configuration.EnvironmentVariables": "1.0.0",
    "Microsoft.Extensions.Configuration.Json": "1.0.0",
    "Microsoft.Extensions.Logging": "1.0.0",
    "Microsoft.Extensions.Logging.Console": "1.0.0",
    "Microsoft.Extensions.Logging.Debug": "1.0.0",
    "Microsoft.Extensions.Options.ConfigurationExtensions": "1.0.0",
    "Microsoft.VisualStudio.Web.BrowserLink.Loader": "14.0.0"
  },

  "tools": {
    "BundlerMinifier.Core": "2.0.238",
    "Microsoft.AspNetCore.Razor.Tools": "1.0.0-preview2-final",
    "Microsoft.AspNetCore.Server.IISIntegration.Tools": "1.0.0-preview2-final"
  },

  "frameworks": {
    "netcoreapp1.0": {
      "imports": [
        "dotnet5.6",
        "portable-net45+win8"
      ]
    }
  },

  "buildOptions": {
    "emitEntryPoint": true,
    "preserveCompilationContext": true
  },

  "runtimeOptions": {
    "configProperties": {
      "System.GC.Server": true
    }
  },

  "publishOptions": {
    "include": [
      "wwwroot",
      "**/*.cshtml",
      "appsettings.json",
      "web.config"
    ]
  },

  "scripts": {
    "prepublish": [ "bower install", "dotnet bundle" ],
    "postpublish": [ "dotnet publish-iis --publish-folder %publish:OutputPath% --framework %publish:FullTargetFramework%" ]
  }
}
また、プロジェクトをビルドした際に、バージョン表記が出力されます。
[root@centos7 WebApplication1]# dotnet build
Project WebApplication1 (.NETCoreApp,Version=v1.0) will be compiled because expected outputs are missing
Compiling WebApplication1 for .NETCoreApp,Version=v1.0    <--ココ

Compilation succeeded.
    0 Warning(s)
    0 Error(s)

Time elapsed 00:00:02.5954545
バージョンを書き換える
まずはframeworksセクションから。
netcoreapp1.0->netcoreapp1.1に書き換えます。

書き換えてから保存すると、その都度バッケージの復元処理が走ります。

書き換えたあと、ビルドが通らなくなることがあります。
複数項目を一括で書き換えたあとにビルドが通らなくなった場合、どの項目が原因なのかが分からなくなるため、書き換える都度ビルドします。

次にdependenciesセクション。
依存dllのバージョンですね。
Visual Studio 2015 Update3では、バージョン表記を一旦消してからCtrl + SpaceするとIntelliSenceが候補を挙げてくれます。

このようにして書き換えた結果が、下記になります。
{
  "dependencies": {
    "Microsoft.NETCore.App": {
      "version": "1.1.0",
      "type": "platform"
    },
    "Microsoft.AspNetCore.Diagnostics": "1.1.0",
    "Microsoft.AspNetCore.Mvc": "1.1.0",
    "Microsoft.AspNetCore.Razor.Tools": {
      "version": "1.1.0-preview4-final",
      "type": "build"
    },
    "Microsoft.AspNetCore.Routing": "1.1.0",
    "Microsoft.AspNetCore.Server.IISIntegration": "1.1.0",
    "Microsoft.AspNetCore.Server.Kestrel": "1.1.0",
    "Microsoft.AspNetCore.StaticFiles": "1.1.0",
    "Microsoft.Extensions.Configuration.EnvironmentVariables": "1.1.0",
    "Microsoft.Extensions.Configuration.Json": "1.1.0",
    "Microsoft.Extensions.Logging": "1.1.0",
    "Microsoft.Extensions.Logging.Console": "1.1.0",
    "Microsoft.Extensions.Logging.Debug": "1.1.0",
    "Microsoft.Extensions.Options.ConfigurationExtensions": "1.1.0",
    "Microsoft.VisualStudio.Web.BrowserLink.Loader": "14.1.0"
  },

  "tools": {
    "BundlerMinifier.Core": "2.0.238",
    "Microsoft.AspNetCore.Razor.Tools": "1.1.0-preview4-final",
    "Microsoft.AspNetCore.Server.IISIntegration.Tools": "1.1.0-preview4-final"
  },

  "frameworks": {
    "netcoreapp1.1": {
      "imports": [
        "dotnet5.6",
        "portable-net45+win8"
      ]
    }
  },

  "buildOptions": {
    "emitEntryPoint": true,
    "preserveCompilationContext": true
  },

  "runtimeOptions": {
    "configProperties": {
      "System.GC.Server": true
    }
  },

  "publishOptions": {
    "include": [
      "wwwroot",
      "**/*.cshtml",
      "appsettings.json",
      "web.config"
    ]
  },

  "scripts": {
    "prepublish": [ "bower install", "dotnet bundle" ],
    "postpublish": [ "dotnet publish-iis --publish-folder %publish:OutputPath% --framework %publish:FullTargetFramework%" ]
  }
}
差分はこんな感じ。

ビルド時のバージョン表記も、変わってますね。
[root@centos7 WebApplication1]# dotnet build
Project WebApplication1 (.NETCoreApp,Version=v1.1) will be compiled because expected outputs are missing
Compiling WebApplication1 for .NETCoreApp,Version=v1.1

Compilation succeeded.
    0 Warning(s)
    0 Error(s)

Time elapsed 00:00:12.9917026
Visual Studio for Mac は .NET Core の夢を見るか?
macの.NET関連技術について、ちょろっと試します。
Visual Studio for Macは、ASP.NET Coreプロジェクトを編集できるの?
できませんでした...。
こんなエラーが出ます。

Visual Studio for Macは、*.xproj形式のプロジェクト定義ファイルを読めません。
今後対応が入るかどうかは、分かりません。
こちらに詳しいですが、Visual Studio 2017から、.NET Coreプロジェクトの定義ファイル形式が、現在の*.xproj形式から旧来.NET Frameworkプロジェクトの*.csproj形式に戻るそうです。
参考:
Visual Studio for Macの.NET Coreサポートの実装について
MSBuild ベースの .NET Core Tools の「アルファ版」を発表
Visual Studio for Macは、Xamarin build hostになれるの?
なれます!
 こちらの接続先macには、
Xamarin Studioは入っておりません。
裏にうっすら見えていますが、Storyboardも開けています。(相変わらず激重ですが)
今まで、build hostにはXamarin Studio Community Editionを入れてましたが。
Xamarin本家のページを見る限り、今後はVisual Studio for Macに置き換えていくようですね。
というよりむしろ。
Visual Studio for Macは、Xamarin Studioのお色直し版、ですね。
macOS10.11で、ASP.NET Coreアプリを動かす
.NET Coreは mac でも動くとのこと。
ウチではWindowsとLinuxが主ですが、mac使いのプログラマも多いですよね。
macでの.NET Coreは、さて、どんなものか。
ざっと試してみます。
Homebrewをインストール
どうやら、最新のopensslが要るんだぜ、と。
Homebrewというヤツを入れるのが手っ取り早いぜ、とのこと。
どうやら、yumのようなパッケージ管理システムのようです。
いれます。
mac-05rw:~ 05rw$ /usr/bin/ruby -e "$(curl -fsSL https://raw.githubusercontent.com/Homebrew/install/master/install)"
==> This script will install:
/usr/local/bin/brew
/usr/local/share/doc/homebrew
 --- 中略 ---
- Run `brew help` to get started
- Further documentation:
    https://git.io/brew-docs
mac-05rw:~ 05rw$
opensslをインストール
続いてご指名のopensslを、貰ってきます。
mac-05rw:~ 05rw$ brew install openssl
==> Downloading https://homebrew.bintray.com/bottles/openssl-1.0.2j.el_capitan.b
######################################################################## 100.0%
==> Pouring openssl-1.0.2j.el_capitan.bottle.tar.gz
 --- 中略 ---
    CPPFLAGS: -I/usr/local/opt/openssl/include

==> Summary
🍺  /usr/local/Cellar/openssl/1.0.2j: 1,695 files, 12M
なんか旨そうなの見えてますけど。
リンクも張りますよ。
mac-05rw:~ 05rw$ mkdir -p /usr/local/lib
mac-05rw:~ 05rw$ ln -s /usr/local/opt/openssl/lib/libcrypto.1.0.0.dylib /usr/local/lib/
mac-05rw:~ 05rw$ ln -s /usr/local/opt/openssl/lib/libssl.1.0.0.dylib /usr/local/lib/
.NET Core SDKをインストール
公式バイナリ配布ページからtar玉を、ver1.1.0とver1.0.1の二つを貰ってきます。

解凍先フォルダをバージョンごとに
- ver1.1.0用 - ./dotnet
- ver1.0.1用 - ./dotnet101
のように二つ作り、それぞれを解凍します。
mac-05rw:~ 05rw$ cd Downloads/
mac-05rw:Downloads 05rw$ ls -alF
total 426504
drwx------+  5 05rw  staff        170 12  5 18:29 ./
drwxr-xr-x+ 13 05rw  staff        442 12  5 18:39 ../
-rw-------   1 05rw  staff          0 11 26 16:33 .localized
-rw-r--r--@  1 05rw  staff  106342400 12  5 18:21 dotnet-dev-osx-x64.1.0.0-preview2-003131.tar
-rw-r--r--@  1 05rw  staff  112025600 12  5 18:21 dotnet-dev-osx-x64.1.0.0-preview2-1-003177.tar
mac-05rw:Downloads 05rw$ mkdir dotnet101
mac-05rw:Downloads 05rw$ mkdir dotnet
mac-05rw:Downloads 05rw$ tar xvf dotnet-dev-osx-x64.1.0.0-preview2-003131.tar -C ./dotnet101/
x ./
x ./dotnet
x ./host/
 --- 中略 ---
x ./host/fxr/
x ./host/fxr/1.0.1/
x ./host/fxr/1.0.1/libhostfxr.dylib
mac-05rw:Downloads 05rw$ tar xvf dotnet-dev-osx-x64.1.0.0-preview2-1-003177.tar -C ./dotnet/
x ./
x ./dotnet
x ./host/
 --- 中略 ---
x ./host/fxr/
x ./host/fxr/1.1.0/
x ./host/fxr/1.1.0/libhostfxr.dylib
まず新しい方、ver1.1.0を、/usr/local/opt/dotnet/に配置します。
mac-05rw:Downloads 05rw$ sudo mv ./dotnet /usr/local/opt/dotnet
ver1.0.1の方は、テキストファイルとdotnetコマンドを削除して...
mac-05rw:Downloads 05rw$ ls -alF ./dotnet101/
total 352
drwxr-xr-x  8 05rw  staff     272 12  5 19:25 ./
drwx------+ 6 05rw  staff     204 12  5 19:16 ../
-rw-r--r--  1 05rw  staff    9410  6 16 09:15 LICENSE.txt             <- これと、
-rw-r--r--  1 05rw  staff    8103  6 16 09:15 ThirdPartyNotices.txt   <- これと、
-rwxr-xr-x  1 05rw  staff  155976  6 16 09:19 dotnet*                 <- これを削除
drwxr-xr-x  3 05rw  staff     102  9  1 07:59 host/
drwxr-xr-x  3 05rw  staff     102  9  1 07:59 sdk/
drwxr-xr-x  3 05rw  staff     102  9  1 07:59 shared/
mac-05rw:Downloads 05rw$ rm ./dotnet101/*.txt
mac-05rw:Downloads 05rw$ rm ./dotnet101/dotnet
残った3つのフォルダを、/usr/local/opt/dotnet/に上書きコピーします。
mac-05rw:Downloads 05rw$ cp -Rf ./dotnet101/* /usr/local/opt/dotnet/
二つのバージョンが、併存してますね!
mac-05rw:Downloads 05rw$ ls -alF /usr/local/opt/dotnet/host/fxr/
total 0
drwxr-xr-x  4 05rw  staff  136 12  5 19:20 ./
drwxr-xr-x  3 05rw  staff  102 12  5 19:12 ../
drwxr-xr-x  3 05rw  staff  102 12  5 19:20 1.0.1/
drwxr-xr-x  3 05rw  staff  102 12  5 19:12 1.1.0/
/usr/local/bin/の下へ、シンボリックリンクを作ります。
mac-05rw:Downloads 05rw$ sudo ln -s /usr/local/opt/dotnet/dotnet /usr/local/bin/
以上でインストール終了です。
mac-05rw:Downloads 05rw$ dotnet --version
1.0.0-preview2-1-003177
動いてます!
ASP.NET Coreプロジェクトを実行してみる
ソースをgitから貰ってきて、動かしてみましょう。
CentOS7-GitBucketサーバ のIPアドレスをhostsに追記してから、git cloneします。
mac-05rw:Downloads 05rw$ git clone http://git.centos7.local/git/05rw/dotnet_sample.git
Cloning into 'dotnet_sample'...
Username for 'http://git.centos7.local': 05rw
Password for 'http://05rw@git.centos7.local':
remote: Counting objects: 102, done
remote: Finding sources: 100% (102/102)
remote: Getting sizes: 100% (95/95)
remote: Total 102 (delta 4), reused 102 (delta 4)
Receiving objects: 100% (102/102), 517.99 KiB | 0 bytes/s, done.
Resolving deltas: 100% (4/4), done.
Checking connectivity... done.
ソースがもらえました。
プロジェクトのルートに移動して、restoreとbuildを試します...。
mac-05rw:Downloads 05rw$ cd dotnet_sample/src/WebApplication1
mac-05rw:WebApplication1 05rw$ dotnet restore

Welcome to .NET Core!
---------------------
Learn more about .NET Core @ https://aka.ms/dotnet-docs. Use dotnet --help to see available commands or go to https://aka.ms/dotnet-cli-docs.
 --- 中略 ---
log  : Writing lock file to disk. Path: /Users/vm/Downloads/dotnet_sample/src/WebApplication1/project.lock.json
log  : ./dotnet_sample/src/WebApplication1/project.json
log  : Restore completed in 44161ms.
mac-05rw:WebApplication1 05rw$  dotnet build
Project WebApplication1 (.NETCoreApp,Version=v1.0) will be compiled because expected outputs are missing
Compiling WebApplication1 for .NETCoreApp,Version=v1.0

Compilation succeeded.
    0 Warning(s)
    0 Error(s)

Time elapsed 00:00:03.0704619
おおー、ビルドも通りましたね。
実行してみますか。
mac-05rw:WebApplication1 05rw$ dotnet run
Hosting environment: Production
Content root path: /Users/vm/Downloads
Now listening on: http://localhost:5000
Application started. Press Ctrl+C to shut down.
待機状態になりました!
ブラウザからアクセスしてみます。
せっかくGUIがあるので、ローカルのSafariから...

動いてます!
今回分のソースコードはこちら。
前回から特に変更ありません。
github.com
Linux(CentOS7)で、ASP.NET Coreアプリのビルド自動化(2)
前回の続きです。必要なツール類を、概ねインストールできました。
今回は、ツールの初期設定から連携動作確認まで持っていきます。
Gitを入れてなかった
GitBucketでGitを受け付けるサーバは入ったのですが、コマンドラインツールのgitを入れるのを忘れてました。
Jenkinsが使うので、入れときます。
[root@centos7 ~]# yum -y install git
読み込んだプラグイン:fastestmirror
Loading mirror speeds from cached hostfile
  --- 中略 ---
  rsync.x86_64 0:3.0.9-17.el7

完了しました!
CentOS7側の hosts を編集
今のところCentOS7は検証環境なので、DNSによる名前解決ができません。
前回の開発用Windows機と同様に、/etc/hostsにドメイン名を書き込んでおきます。
127.0.0.1   localhost localhost.localdomain localhost4 localhost4.localdomain4
::1         localhost localhost.localdomain localhost6 localhost6.localdomain6

# --- 下記行を追記 ---
127.0.0.1   dotnet.centos7.local git.centos7.local jenkins.centos7.local
名前解決、出来てますかね?
[root@centos7 ~]# ping dotnet.centos7.local
PING dotnet.centos7.local (127.0.0.1) 56(84) bytes of data.
64 bytes from localhost (127.0.0.1): icmp_seq=1 ttl=64 time=0.019 ms
64 bytes from localhost (127.0.0.1): icmp_seq=2 ttl=64 time=0.055 ms
^C
--- dotnet.centos7.local ping statistics ---
2 packets transmitted, 2 received, 0% packet loss, time 1000ms
rtt min/avg/max/mdev = 0.019/0.037/0.055/0.018 ms
[root@centos7 ~]# ping git.centos7.local
PING dotnet.centos7.local (127.0.0.1) 56(84) bytes of data.
64 bytes from localhost (127.0.0.1): icmp_seq=1 ttl=64 time=0.019 ms
64 bytes from localhost (127.0.0.1): icmp_seq=2 ttl=64 time=0.055 ms
^C
--- dotnet.centos7.local ping statistics ---
2 packets transmitted, 2 received, 0% packet loss, time 999ms
rtt min/avg/max/mdev = 0.019/0.037/0.055/0.018 ms
[root@centos7 ~]# ping jenkins.centos7.local
PING dotnet.centos7.local (127.0.0.1) 56(84) bytes of data.
64 bytes from localhost (127.0.0.1): icmp_seq=1 ttl=64 time=0.021 ms
^C
--- dotnet.centos7.local ping statistics ---
1 packets transmitted, 1 received, 0% packet loss, time 0ms
rtt min/avg/max/mdev = 0.021/0.021/0.021/0.000 ms
[root@centos7 ~]# ping localhost
PING localhost (127.0.0.1) 56(84) bytes of data.
64 bytes from localhost (127.0.0.1): icmp_seq=1 ttl=64 time=0.021 ms
^C
--- localhost ping statistics ---
1 packets transmitted, 1 received, 0% packet loss, time 0ms
rtt min/avg/max/mdev = 0.021/0.021/0.021/0.000 ms
大丈夫ですね。
GitBucketのセットアップ
GitBucketに、ASP.NET Coreアプリ用のリポジトリを作っておきます。
git.centos7.localにアクセスして、ログインします。
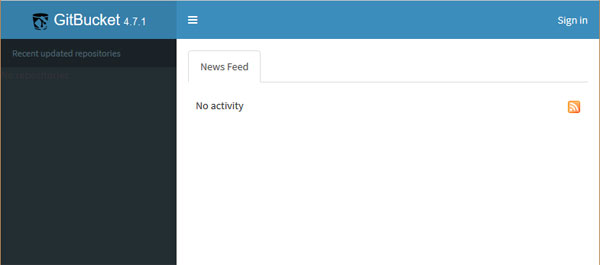
まずは初期ユーザー root でログイン。
初期状態のパスワードは root です。
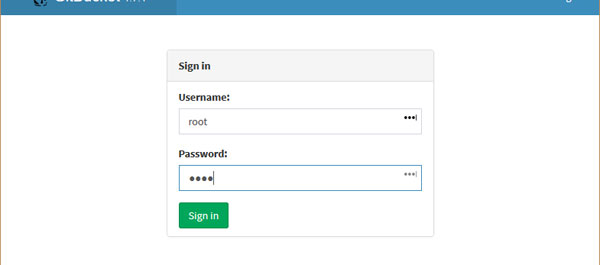
このあと、
などなどをやりました。
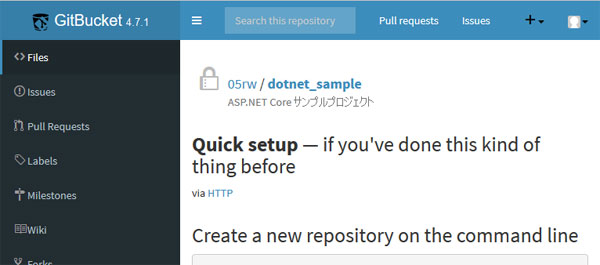
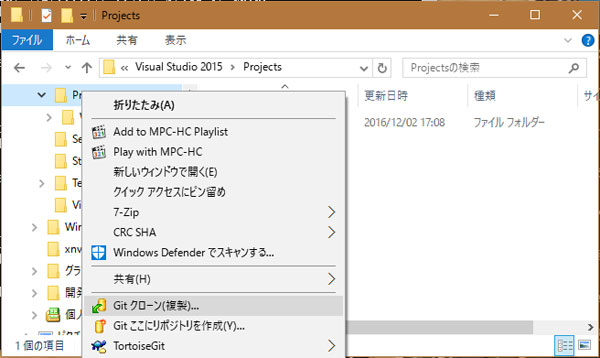
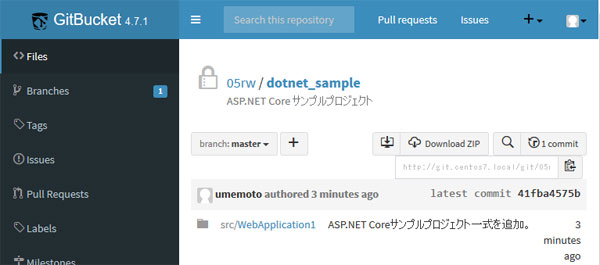
開発用Windows機上の ASP.NET Coreプロジェクトファイル一式を、Gitリポジトリに追加します。
GitBucket上でも、追加されたファイルが確認できますね。
Jenkinsのセットアップ
次はJenkins。
インストール手順は、ほぼこちらにあるとおりをなぞります。
jenkins.centos7.localにアクセスします。
初回アクセス時には、アンロック用文字列を入力が必要です。
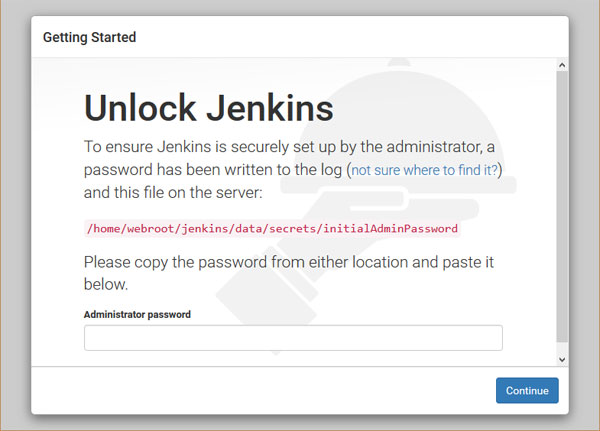
画面の赤字のパスにあるファイルを開いて、文字列をコピペします。
[root@centos7 ~]# cat /home/webroot/jenkins/data/secrets/initialAdminPassword
--- アンロック用文字列が、記号なし小文字のみの英数で表示されます ---
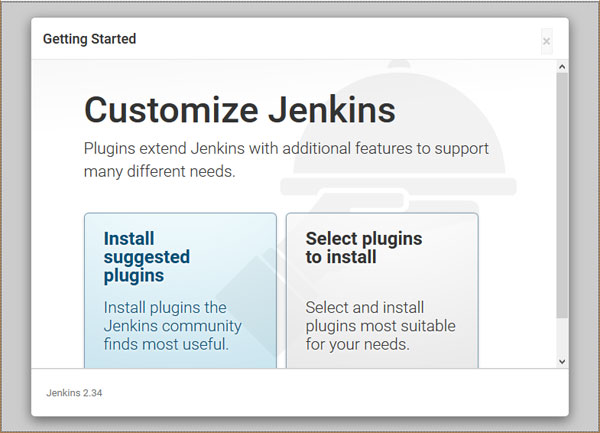
次はプラグインのインストール内容を選びます。
お勧め一式を入れてくれるそうなので、左側の青いボタンを選びます。
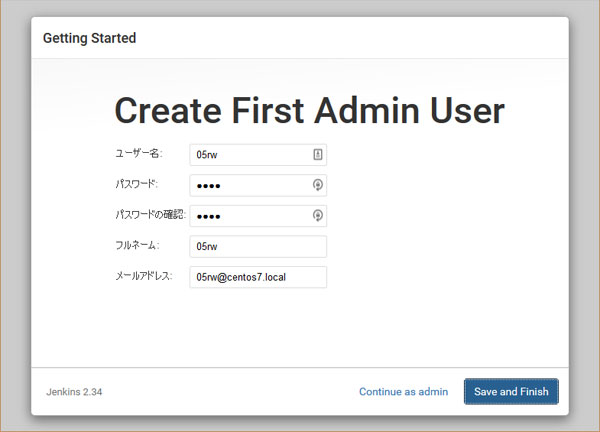
プラグインのインストール進捗が全て終わると、管理者ユーザー設定になります。
初期設定が完了すると、ダッシュボードが表示されます。
GitBucket連携用プラグインをインストールするため、「Jenkinsの管理」へ。
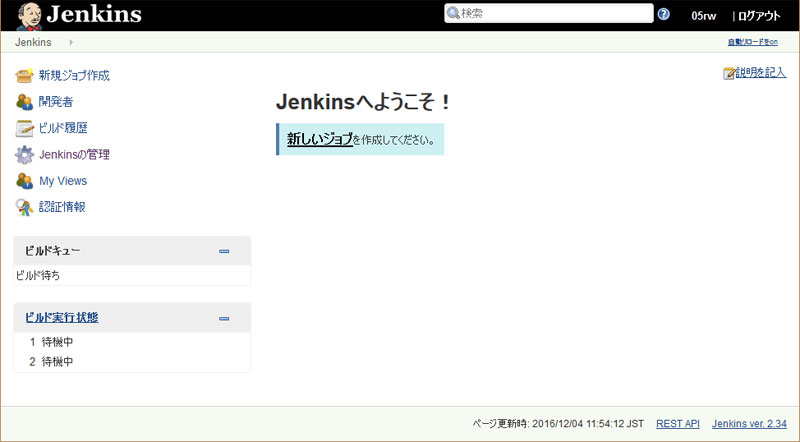
リバースプロキシの警告が出ちゃってるんですが、どうにも直りませんでした。
ぐぐっても、JenkinsURLのポート指定解除くらいしか出てこない...?
放っといて、「プラグインの管理」に行きます。
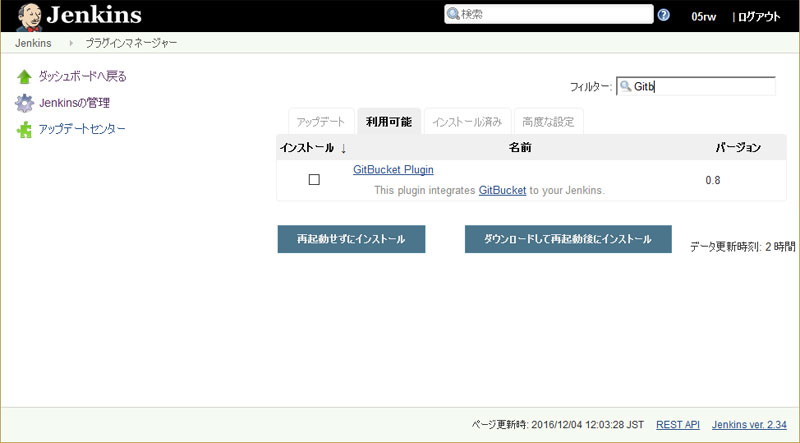
利用可能タブを開いて、フィルターに"Gitb"と入力すると。
出てきましたね、「GitBucket Plugin」
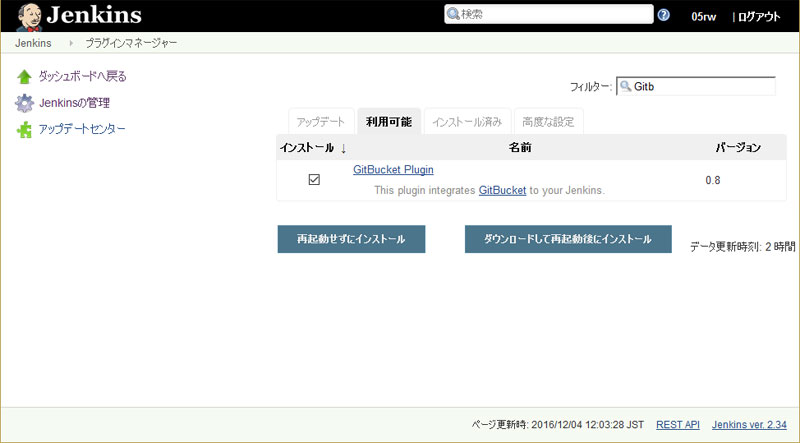
チェックを入れて「再起動せずにインストール」を選びます。
成功したようですね。
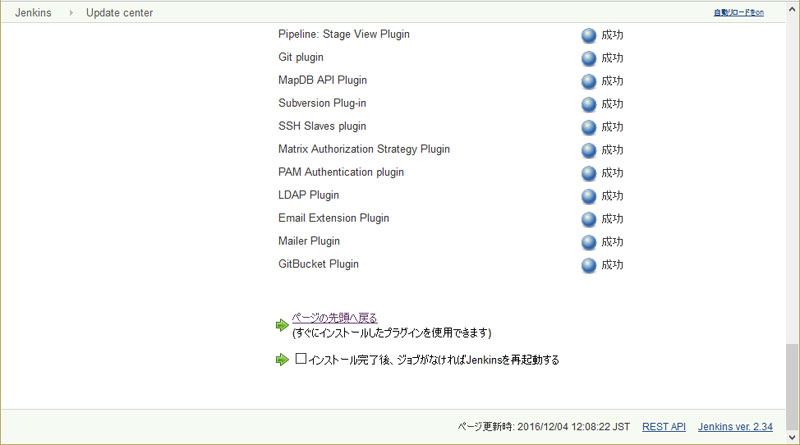
参考:
JenkinsとGitBucketを連携し、pushされたら自動的にソースを取得する(GitBucket Plugin)
Jenkinsにジョブを追加する
やることが無くてひまぷーなJenkinsさんに、早速お仕事を教えてあげましょう。
ふふっ、世の中は厳しいんだぜ。
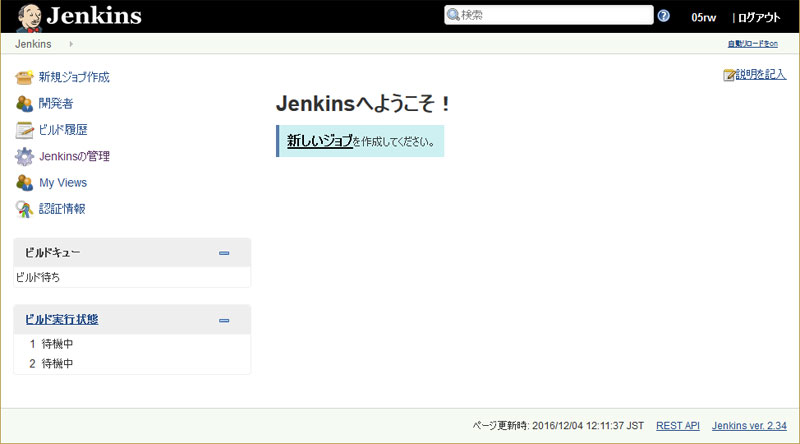
改めてダッシュボードに戻り、「新規ジョブ作成」を選びます。
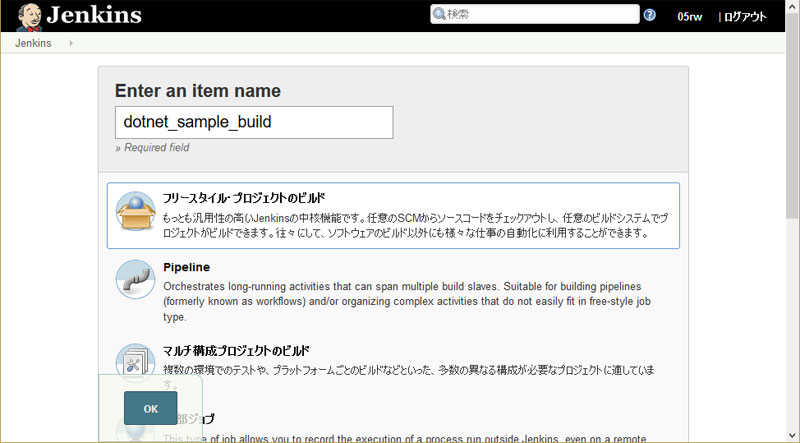
ジョブ名称を入力して、「フリースタイル・プロジェクトのビルド」を選びます。
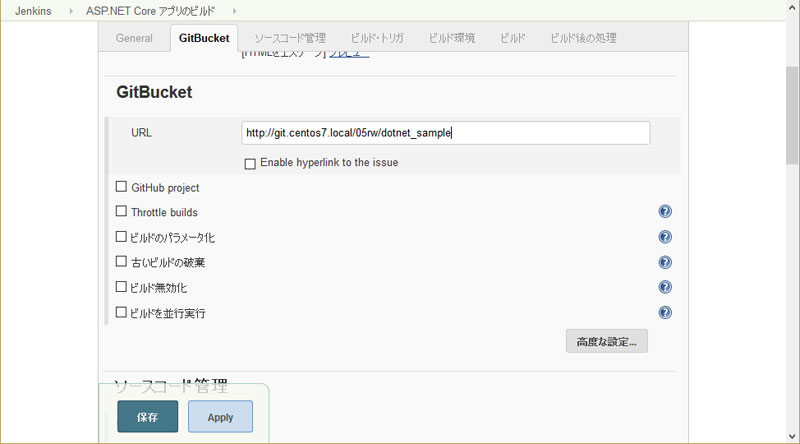
ジョブの詳細設定を入力する画面になりました。
「GitBucket」セクションで、上で作ったリポジトリのトップURL http://git.centos7.local/05rw/dotnet_sampleを入力します。
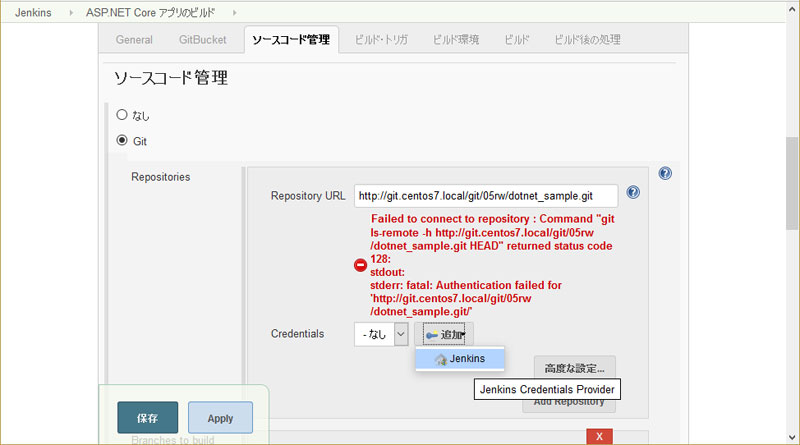
「ソースコード管理」セクションで、同リポジトリのクローン用URL http://git.centos7.local/git/05rw/dotnet_sample.git を入力します。
エラー表示が出ます。「Authentication failed」とのこと。
認証情報も追加しましょう。
Credentials項目の「追加」メニューを押し、Jenkins を選びます。
設定項目が沢山並んでますが、ユーザー名とパスワードだけ入力します。
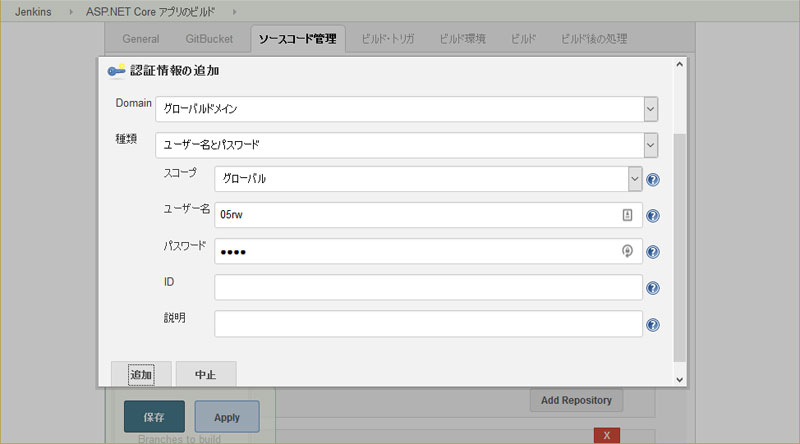
あれー?エラー消えてない?
追加した Credentials は、自動で選択してくれないようですね。

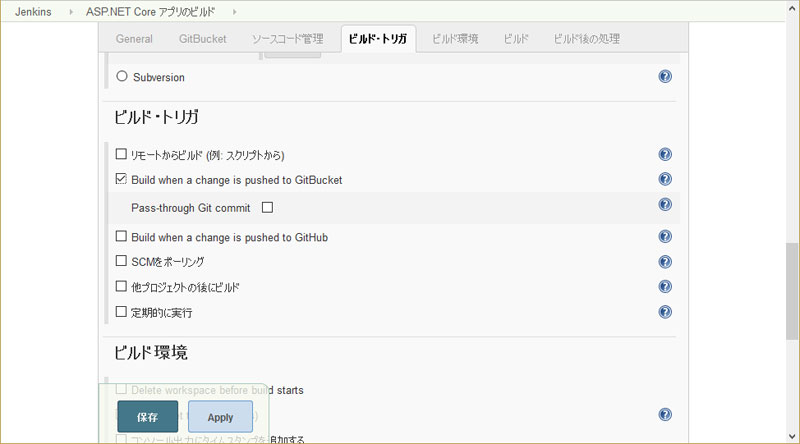
「ビルド・トリガ」セクションで、「Build when a change is pushed ot GitBucket」にチェックを入れます。
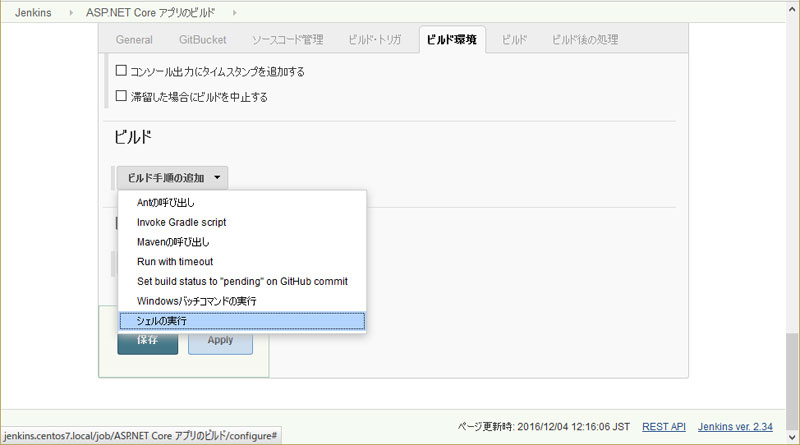
「ビルド」セクションで、「ビルド手順の追加」メニューから「シェルの実行」を選びます。
シェルスクリプトを入力します。
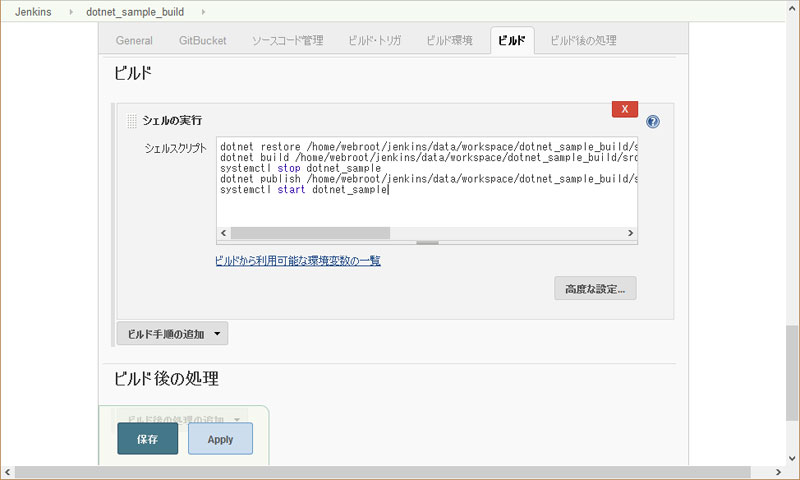
dotnetコマンドrestore, build, publishのリファレンスを参考に、スクリプトを書きます。
build, publishには記述がありませんが、restoreと同様に第一引数にプロジェクトパスをセットできるようです。
Jenkinsはジョブを実行すると、[Jenkinsデータフォルダ]/[ジョブ名]/の下に、Gitリポジトリのファイル一式を展開します。
スクリプトで指定するパスは、そのあたりを念頭に置いて書きます。
dotnet restore /home/webroot/jenkins/data/workspace/dotnet_sample_build/src/WebApplication1/
dotnet build /home/webroot/jenkins/data/workspace/dotnet_sample_build/src/WebApplication1/
systemctl stop dotnet_sample
dotnet publish /home/webroot/jenkins/data/workspace/dotnet_sample_build/src/WebApplication1/ --configuration Release --output /home/webroot/dotnet_sample/bin
systemctl start dotnet_sample
やれやれ、やっとジョブ情報を入力しおわりました。
保存して戻ります。
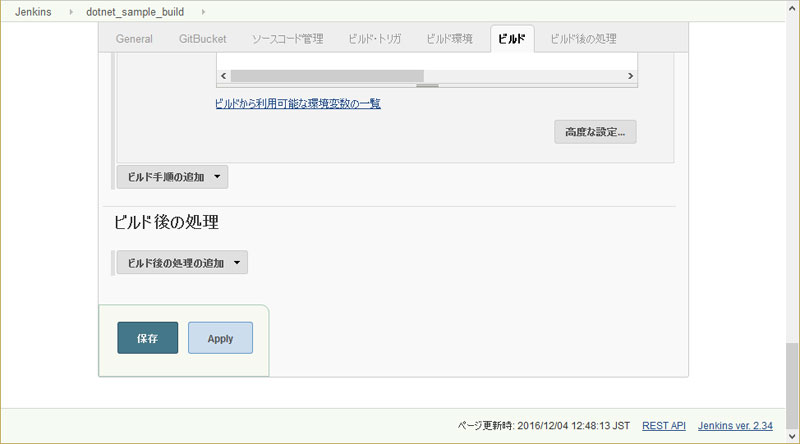
ジョブが出来ましたね!
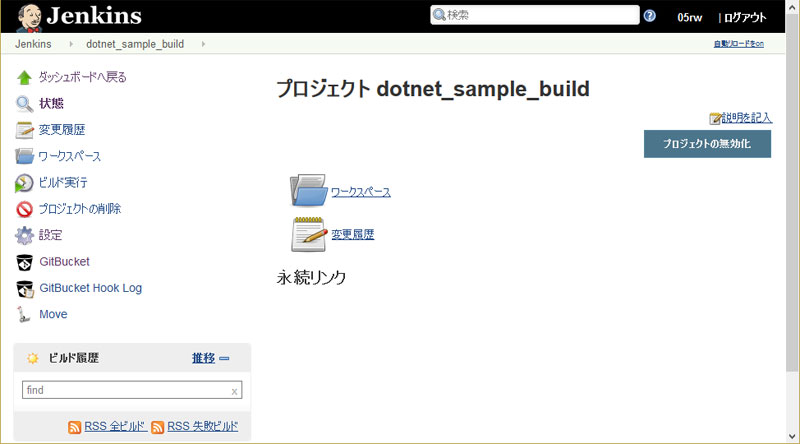
「ビルド実行」を試してみます。
左下のビルド履歴に進捗が表示され、しばらく待つと履歴行が増えていますね。
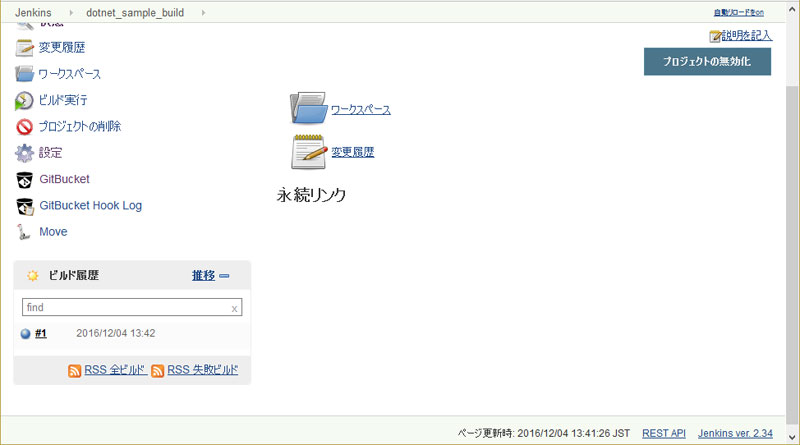
記念すべき初回ビルド#1の詳細内容は、ビルド履歴行の左端の〇をクリックすると出てきます。
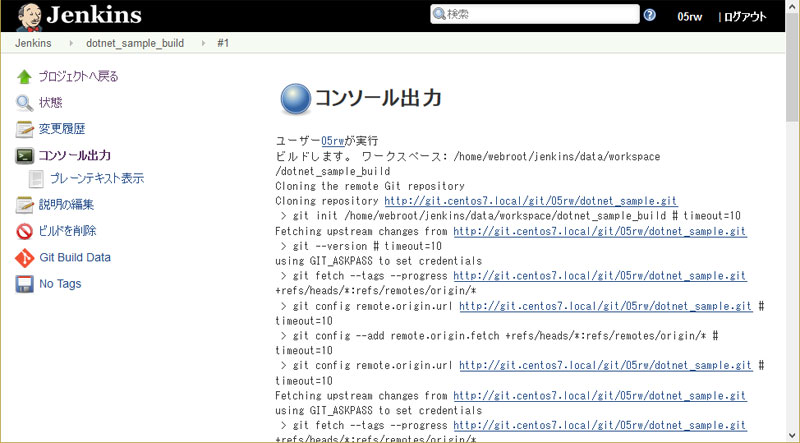
ユーザー05rwが実行
ビルドします。 ワークスペース: /home/webroot/jenkins/data/workspace/dotnet_sample_build
 > git rev-parse --is-inside-work-tree # timeout=10
Fetching changes from the remote Git repository
 > git config remote.origin.url http://git.centos7.local/git/05rw/dotnet_sample.git # timeout=10
Fetching upstream changes from http://git.centos7.local/git/05rw/dotnet_sample.git
 > git --version # timeout=10
using GIT_ASKPASS to set credentials
 > git fetch --tags --progress http://git.centos7.local/git/05rw/dotnet_sample.git +refs/heads/*:refs/remotes/origin/*
 > git rev-parse refs/remotes/origin/master^{commit} # timeout=10
 > git rev-parse refs/remotes/origin/origin/master^{commit} # timeout=10
Checking out Revision c303273cfc10f328edfb4ab4d97cc965b949592c (refs/remotes/origin/master)
 > git config core.sparsecheckout # timeout=10
 > git checkout -f c303273cfc10f328edfb4ab4d97cc965b949592c
 > git rev-list c303273cfc10f328edfb4ab4d97cc965b949592c # timeout=10
[dotnet_sample_build] $ /bin/sh -xe /tmp/hudson9163061906313740256.sh
+ dotnet restore /home/webroot/jenkins/data/workspace/dotnet_sample_build/src/WebApplication1/
log  : Restoring packages for /home/webroot/jenkins/data/workspace/dotnet_sample_build/src/WebApplication1/project.json...
log  : Restoring packages for tool 'BundlerMinifier.Core' in /home/webroot/jenkins/data/workspace/dotnet_sample_build/src/WebApplication1/project.json...
log  : Restoring packages for tool 'Microsoft.AspNetCore.Razor.Tools' in /home/webroot/jenkins/data/workspace/dotnet_sample_build/src/WebApplication1/project.json...
log  : Restoring packages for tool 'Microsoft.AspNetCore.Server.IISIntegration.Tools' in /home/webroot/jenkins/data/workspace/dotnet_sample_build/src/WebApplication1/project.json...
log  : Writing lock file to disk. Path: /home/webroot/jenkins/data/workspace/dotnet_sample_build/src/WebApplication1/project.lock.json
log  : /home/webroot/jenkins/data/workspace/dotnet_sample_build/src/WebApplication1/project.json
log  : Restore completed in 9050ms.
+ dotnet build /home/webroot/jenkins/data/workspace/dotnet_sample_build/src/WebApplication1/
Project WebApplication1 (.NETCoreApp,Version=v1.0) will be compiled because expected outputs are missing
Compiling WebApplication1 for .NETCoreApp,Version=v1.0

Compilation succeeded.
    0 Warning(s)
    0 Error(s)

Time elapsed 00:00:02.1568893


+ systemctl stop dotnet_sample
+ dotnet publish /home/webroot/jenkins/data/workspace/dotnet_sample_build/src/WebApplication1/ --configuration Release --output /home/webroot/dotnet_sample/bin
Publishing WebApplication1 for .NETCoreApp,Version=v1.0
bower ESUDO         Cannot be run with sudo
Additional error details:
Since bower is a user command, there is no need to execute it with superuser permissions.
If you're having permission errors when using bower without sudo, please spend a few minutes learning more about how your system should work and make any necessary repairs.
http://www.joyent.com/blog/installing-node-and-npm
https://gist.github.com/isaacs/579814
You can however run a command with sudo using --allow-root option
Bundling with configuration from /home/webroot/jenkins/data/workspace/dotnet_sample_build/src/WebApplication1/bundleconfig.json
Processing wwwroot/css/site.min.css
  Bundled
  Minified
Processing wwwroot/js/site.min.js
  Bundled
Project WebApplication1 (.NETCoreApp,Version=v1.0) will be compiled because expected outputs are missing
Compiling WebApplication1 for .NETCoreApp,Version=v1.0

Compilation succeeded.
    0 Warning(s)
    0 Error(s)

Time elapsed 00:00:02.0746785


Configuring the following project for use with IIS: '/home/webroot/dotnet_sample/bin'
Updating web.config at '/home/webroot/dotnet_sample/bin/web.config'
Configuring project completed successfully
publish: Published to /home/webroot/dotnet_sample/bin
Published 1/1 projects successfully
+ systemctl start dotnet_sample
Finished: SUCCESS
参考:
dotnet-restore
dotnet-build
dotnet-publish
GitBucketがJenkinsをキックするように
Jenkinsの手動ビルドはできたんですが、まだです。
WebHookを利用して、GitBucketからJenkinsに通知を送るようにしないと、やはりJenkinsさんはひまぷーなままです。
Jenkinsが受け取るWebHookURLは、ジョブ設定→ビルド・トリガのヘルプメッセージに書いてあります。
http://your.jenkins.host/jenkins/gitbucket-webhook/とな。
URLの中の/jenkins/はデフォルトのプレフィクスなので、ウチでは使いません。
設定するURLは、http://jenkins.centos7.local/gitbucket-webhook/ となりますね。
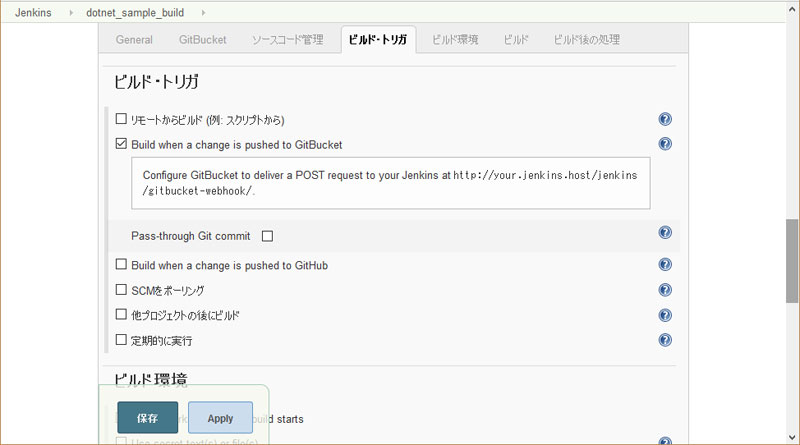
GitBucketに戻ります。
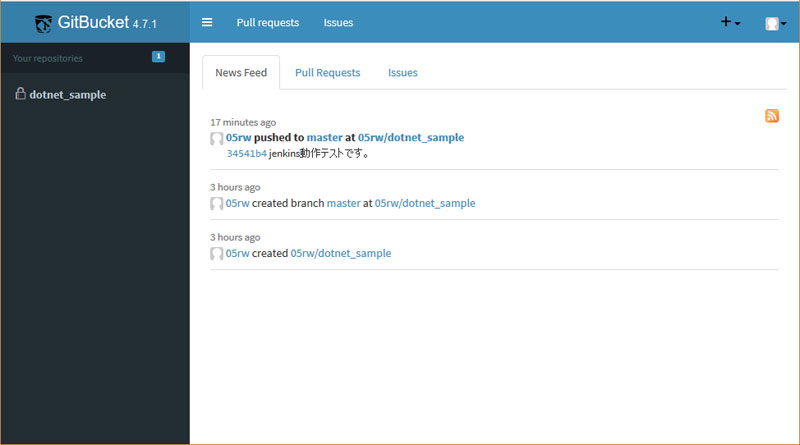
左ペインのdotnet_sampleリポジトリを開きます。
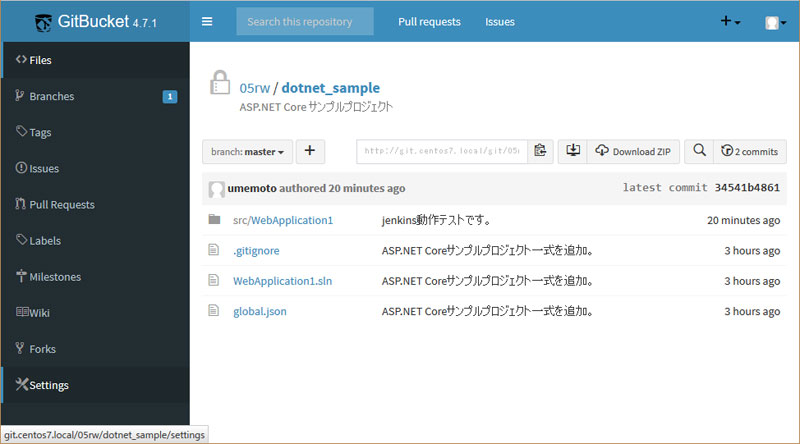
リポジトリ詳細画面の左ペインから、Settinsgを開きます。
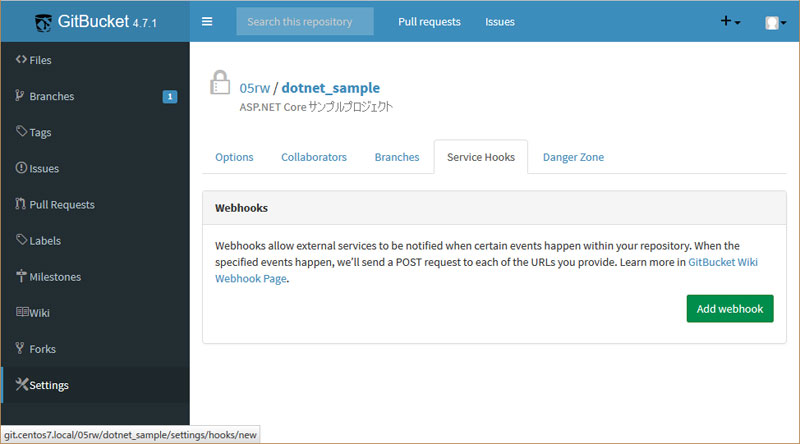
右ペインがリポジトリ設定に切り替わるので、Service Hooksタブを開いて「Add Webhook」を押します。
WebHook編集画面が出てきます。
PayloadURLへ、先ほどのJenkins側WebHookURLを入力します。
その他はデフォルトですね。
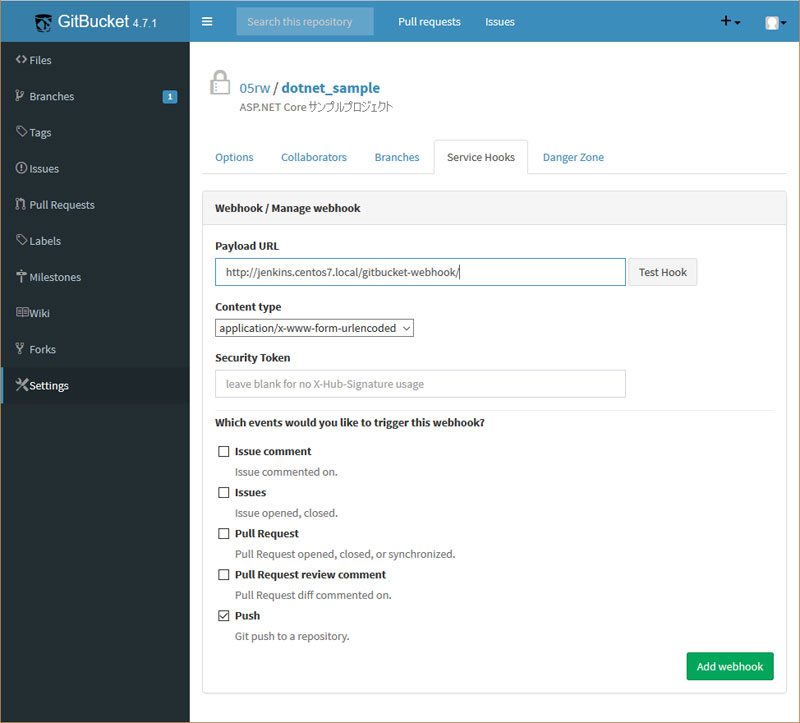
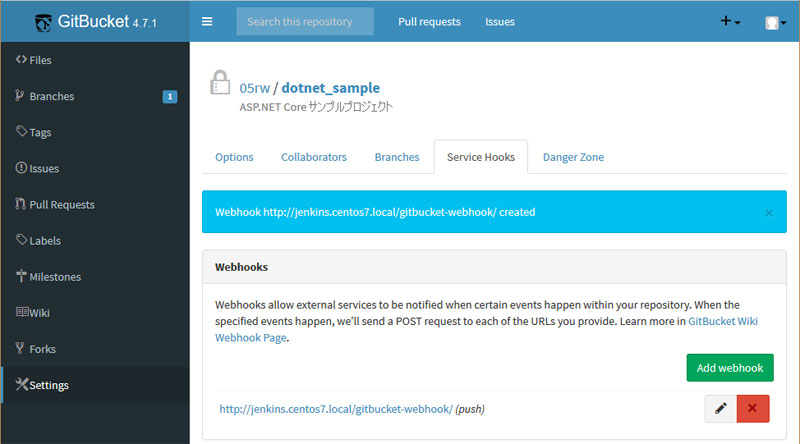
「Add Webhook」ボタンを押すと、WebHookが作られました。
自動化されたか、試してみる
さて、Jenkinsさんがキチンと労働しているか、確かめてみましょう!
現状のdotnet.centos7.localの表示は、こんな感じ。
Visual Studioが作ったテンプレートそのままです。
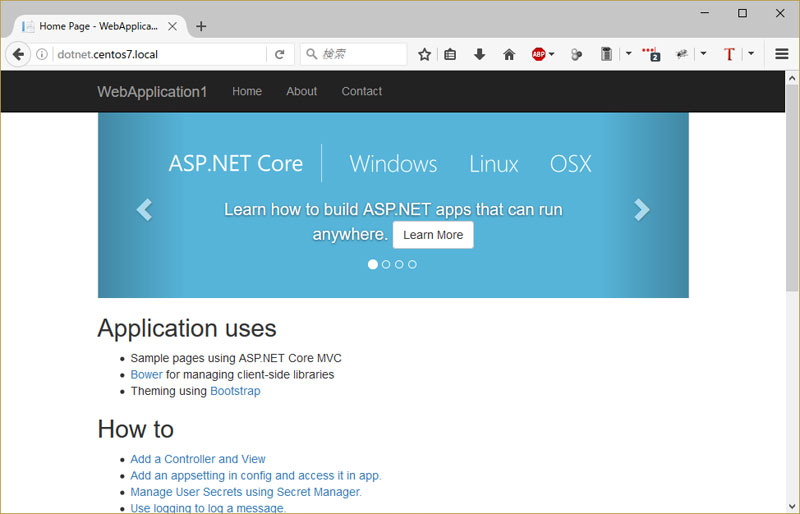
開発用Windows機の方で、このプロジェクトを開いて編集してみましょう。
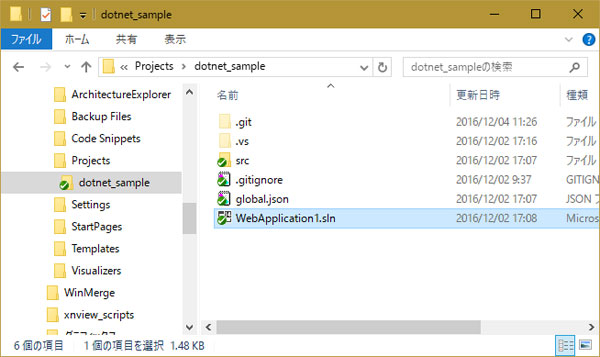
Visual Studio 2015 Update3 で、プロジェクトのViews/Shared/_Layout.cshtmlを開きます。
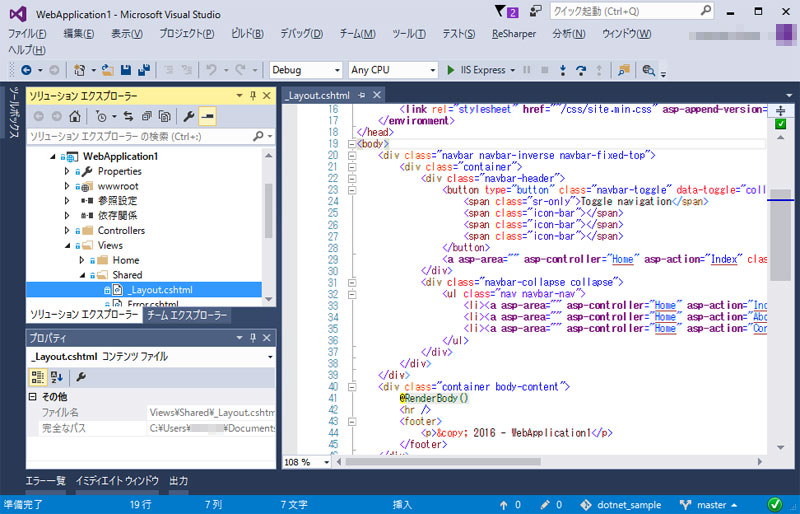
<body>直下に、<div>を差し込んでみました。
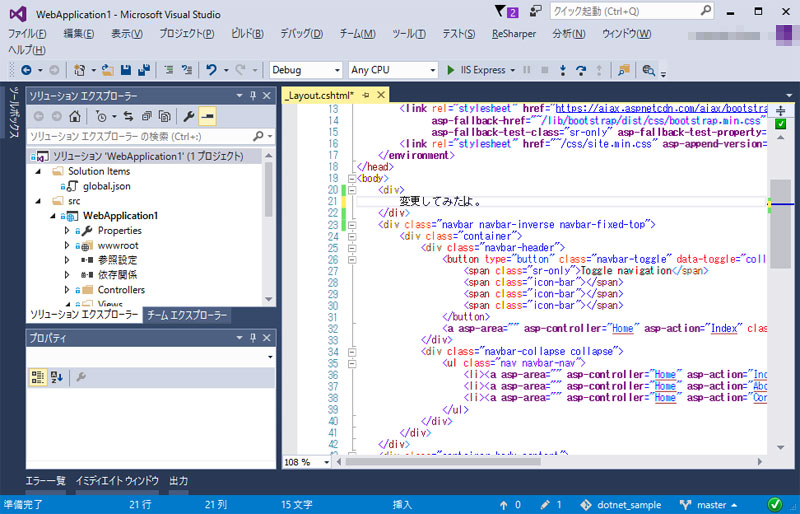
保存してコミット&プッシュします。
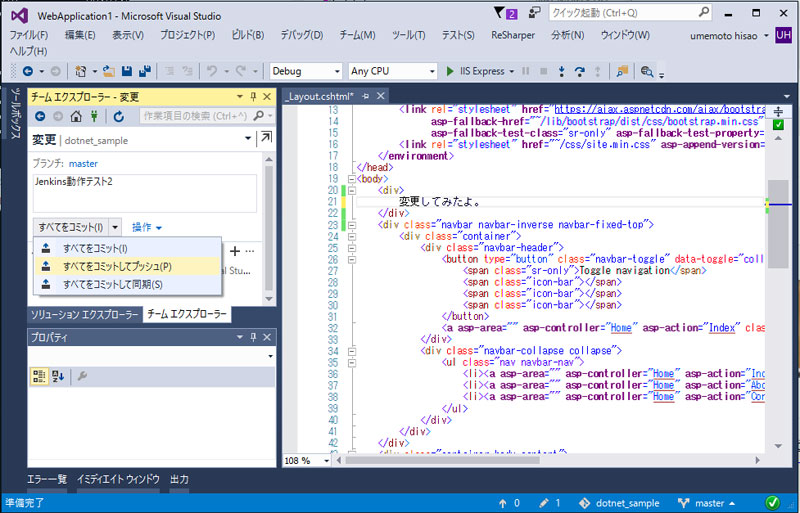
おや、Jenkinsさんに反応が。
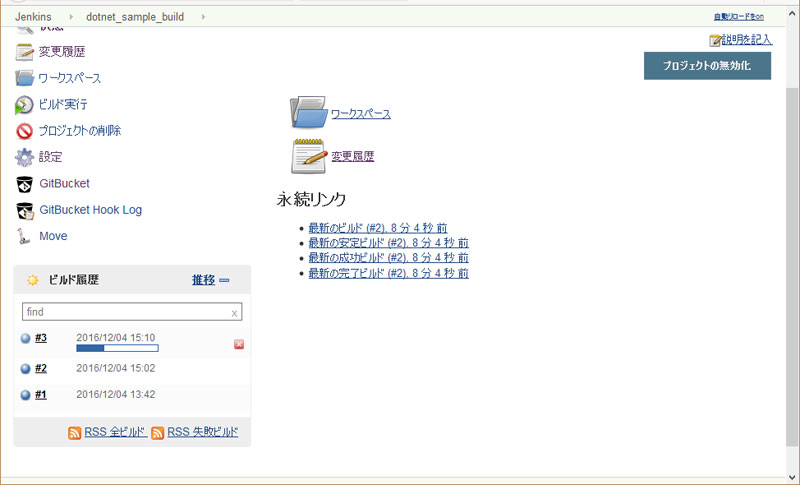
ブラウザから、ASP.NET Coreアプリを見てみます。
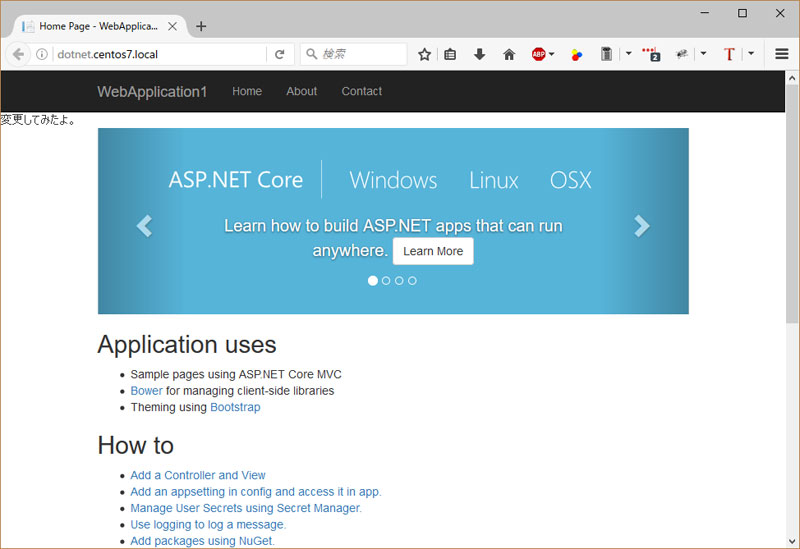
なんかテキストが、割り込んでますね!!!
長かったですが、これでやっと!
WindowsのVisual Studioを操作するだけで、Linux上のASP.NET Coreアプリが更新されるようになりました。
お手軽に、なったぞー!!
今回分のソースコードはこちら。
Jenkinsによる自動ビルド確認のため、ViewのHTMLを書き換えています。
github.com
Linux(CentOS7)で、ASP.NET Coreアプリのビルド自動化(1)
ASP.NET Coreアプリを、サービス化することが出来ました。
しかし、まだPHPのお手軽さ加減には、一歩届きません。
PHPでは、ソースを書き換えただけで、すぐに動作が変わってくれます。
が、ASP.NET Coreはビルドしなきゃいけません。
その都度、sshで入って操作するの、面倒です嫌です。
そこで、Gitを経由したビルドの自動化を試みます。
導入するのは、GitBucketとJenkinsです。
javaの導入
ひとまずは、現在インストール済みの全パッケージを、最新に更新します。
[root@centos7 ~]# yum update
続いて、Javaです。
GitBucket, Jenkinsの両方ともJavaアプリなので、先に入れておきます。
このへんを参考に、一番新しいOpenJDK1.8系パッケージを見てみます。
[root@centos7 ~]# yum list | grep java-1.8
java-1.8.0-openjdk.x86_64               1:1.8.0.111-1.b15.el7_2        updates
java-1.8.0-openjdk-accessibility.x86_64 1:1.8.0.111-1.b15.el7_2        updates
java-1.8.0-openjdk-accessibility-debug.x86_64
java-1.8.0-openjdk-debug.x86_64         1:1.8.0.111-1.b15.el7_2        updates
java-1.8.0-openjdk-demo.x86_64          1:1.8.0.111-1.b15.el7_2        updates
java-1.8.0-openjdk-demo-debug.x86_64    1:1.8.0.111-1.b15.el7_2        updates
java-1.8.0-openjdk-devel.x86_64         1:1.8.0.111-1.b15.el7_2        updates
java-1.8.0-openjdk-devel-debug.x86_64   1:1.8.0.111-1.b15.el7_2        updates
java-1.8.0-openjdk-headless.x86_64      1:1.8.0.111-1.b15.el7_2        updates
java-1.8.0-openjdk-headless-debug.x86_64
java-1.8.0-openjdk-javadoc.noarch       1:1.8.0.111-1.b15.el7_2        updates
java-1.8.0-openjdk-javadoc-debug.noarch 1:1.8.0.111-1.b15.el7_2        updates
java-1.8.0-openjdk-src.x86_64           1:1.8.0.111-1.b15.el7_2        updates
java-1.8.0-openjdk-src-debug.x86_64     1:1.8.0.111-1.b15.el7_2        updates
[root@centos7 ~]#
ほうほう、ありますね。
こちらによると、1.8.0-openjdk,1.8.0-openjdk-headlessを入れておけばよさげ。
また、あとから使う予定のwgetも一緒にインストールします。
[root@centos7 ~]# yum -y install java-1.8.0-openjdk java-1.8.0-openjdk-headless wget
読み込んだプラグイン:fastestmirror
epel/x86_64/metalink                                     | 5.0 kB     00:00
epel                                                     | 4.3 kB     00:00
  --- 中略 ---
  xorg-x11-font-utils.x86_64 1:7.5-20.el7
  xorg-x11-fonts-Type1.noarch 0:7.5-9.el7

完了しました!
どれどれ?
[root@centos7 ~]# java -version
openjdk version "1.8.0_111"
OpenJDK Runtime Environment (build 1.8.0_111-b15)
OpenJDK 64-Bit Server VM (build 25.111-b15, mixed mode)
java、動いてますね。
参考:
参考メモ/CentOS7 の OpenJDK パッケージの構成メモ
GitBucketの導入
バイナリとデータの配置先フォルダを作ります。
[root@centos7 ~]# mkdir -p /home/webroot/gitbucket/bin
[root@centos7 ~]# mkdir -p /home/webroot/gitbucket/data
GitBucketのリリースページから、最新版のgitbucket.warを頂いてきます。
[root@centos7 ~]# cd /home/webroot/gitbucket/bin/
[root@centos7 bin]# wget https://github.com/gitbucket/gitbucket/releases/download/4.7.1/gitbucket.war
--2016-12-03 21:14:28--  https://github.com/gitbucket/gitbucket/releases/download/4.7.1/gitbucket.war
github.com (github.com) をDNSに問いあわせています... 192.30.253.112, 192.30.253.113
  --- 中略 ---
終了しました --2016-12-03 21:15:35--
経過時間: 1m 7s
ダウンロード完了: 1 ファイル、45M バイトを 1m 5s で取得 (707 KB/s)
apacheユーザーが実行出来るよう、所有権を変更しておきます。
[root@centos7 ~]# chown -Rf apache:apache /home/webroot/gitbucket
起動時のデータパスやプレフィクスなどを指定したかったので、tomcat経由でなく直接javaから起動させます。
先だってsystemdのサービス定義方法を覚えたところなので、早速追加しましょう。
[root@centos7 ~]# vi /etc/systemd/system/gitbucket.service
中身はこんなふうに。
[Unit]
    Description=GitBucket Service

    [Service]
    ExecStart=/usr/bin/java -jar /home/webroot/gitbucket/bin/gitbucket.war --gitbucket.home=/home/webroot/gitbucket/data --port=8002 --prefix=/
    WorkingDirectory=/home/webroot/gitbucket/data
    Restart=always
    RestartSec=10
    SyslogIdentifier=gitbucket
    User=apache

    [Install]
    WantedBy=multi-user.target
サービスを起動してみます。
[root@centos7 bin]# systemctl daemon-reload
[root@centos7 bin]# systemctl enable gitbucket
Created symlink from /etc/systemd/system/multi-user.target.wants/gitbucket.service to /etc/systemd/system/gitbucket.service.
[root@centos7 bin]# systemctl start gitbucket
[root@centos7 bin]# systemctl status gitbucket
● gitbucket.service - GitBucket Service
   Loaded: loaded (/etc/systemd/system/gitbucket.service; disabled; vendor preset: disabled)
   Active: active (running) since 日 2016-12-04 00:17:42 JST; 10s ago
 Main PID: 27599 (java)
   CGroup: /system.slice/gitbucket.service
           mq27599 /usr/bin/java -jar /home/webroot/gitbucket/bin/gitbucket.w...

12月 04 00:17:45 centos7.local gitbucket[27599]: Using job-store 'org.quartz...
12月 04 00:17:45 centos7.local gitbucket[27599]: 00:17:45.400 [main] INFO  o...
12月 04 00:17:45 centos7.local gitbucket[27599]: 00:17:45.400 [main] INFO  o...
12月 04 00:17:45 centos7.local gitbucket[27599]: 00:17:45.401 [main] INFO  o...
12月 04 00:17:45 centos7.local gitbucket[27599]: [INFO] [12/04/2016 00:17:45...
12月 04 00:17:45 centos7.local gitbucket[27599]: 00:17:45.420 [main] INFO  o...
12月 04 00:17:45 centos7.local gitbucket[27599]: 00:17:45.423 [main] INFO  o...
12月 04 00:17:45 centos7.local gitbucket[27599]: 2016-12-04 00:17:45.962:INF...
12月 04 00:17:45 centos7.local gitbucket[27599]: 2016-12-04 00:17:45.971:INF...
12月 04 00:17:45 centos7.local gitbucket[27599]: 2016-12-04 00:17:45.971:INF...
Hint: Some lines were ellipsized, use -l to show in full.
サービス定義にある、サーバの8002番ポートにブラウザからアクセスしてみます。
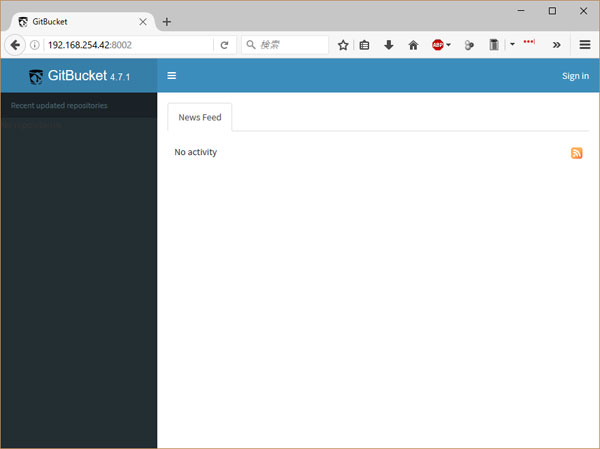
GitBucket、起動してます!
参考:
GitHub gitbucket/gitbucket/release
Jenkinsの導入
概ねGitBucketと同じような流れです。
バイナリとデータの配置先フォルダを作ります。
[root@centos7 ~]# mkdir -p /home/webroot/jenkins/bin
[root@centos7 ~]# mkdir -p /home/webroot/jenkins/data
Jenkinsバイナリ配布ページから、最新版のjenkins.warを貰ってきます。
[root@centos7 ~]# cd /home/webroot/jenkins/bin/
[root@centos7 bin]# wget http://mirrors.jenkins-ci.org/war/latest/jenkins.war
--2016-12-04 00:35:16--  http://mirrors.jenkins-ci.org/war/latest/jenkins.war
mirrors.jenkins-ci.org (mirrors.jenkins-ci.org) をDNSに問いあわせています... 52.202.51.185
  --- 中略 ---
100%[======================================>] 68,851,608   986KB/s 時間 1m 47s

2016-12-04 00:37:04 (630 KB/s) - `jenkins.war' へ保存完了 [68851608/68851608]
apacheユーザーが実行出来るよう、所有権を変更しておきます。
[root@centos7 bin]# chown -Rf apache:apache /home/webroot/jenkins
こちらも起動時のプレフィクスを指定したいので、javaから起動させます。
jenkinsサービスを追加します。
[root@centos7 ~]# vi /etc/systemd/system/jenkins.service
中身はこんなふうに。
[Unit]
    Description=Jenkins Service

    [Service]
    ExecStart=/usr/bin/java -jar /home/webroot/jenkins/bin/jenkins.war --httpPort=8003 --prefix=/
    WorkingDirectory=/home/webroot/jenkins/data
    Restart=always
    RestartSec=10
    SyslogIdentifier=jenkins
    User=root
    Environment=JENKINS_HOME=/home/webroot/jenkins/data

    [Install]
    WantedBy=multi-user.target
環境変数設定Environmentが増えているのがミソです。
GitBucketと違い、開始時にデータフォルダを指定するオプションがありません。
そのためこのあたりを参考に、環境変数でデータフォルダを指定しています。
こういうの、まとめておくとバックアップがラクチンですから。
また、実行権限はrootにしています。
お行儀の悪い設定ではあるんですが...。
Jenkinsはビルド等のシェルスクリプト実行時、サービス再起動などのroot権限が必要な処理を行います。
root以外のユーザーでJenkinsが実行されている場合、visudo設定でsudoの認証を回避することになります。
そうすると、セキュリティもクソもないんですよね。
まあ、Jenkinsの攻撃が成功してしまったらオワリだ、ということで、肚を括りましょう:-)
さて、Jenkinsも起動してみましょう。
[root@centos7 ~]# systemctl daemon-reload
[root@centos7 ~]# systemctl enable jenkins
Created symlink from /etc/systemd/system/multi-user.target.wants/jenkins.service to /etc/systemd/system/jenkins.service.
[root@centos7 ~]# systemctl start jenkins
[root@centos7 ~]# systemctl status jenkins
● jenkins.service - Jenkins Service
   Loaded: loaded (/etc/systemd/system/jenkins.service; enabled; vendor preset: disabled)
   Active: active (running) since 日 2016-12-04 01:43:20 JST; 6s ago
 Main PID: 28999 (java)
   CGroup: /system.slice/jenkins.service
           mq28999 /usr/bin/java -jar /home/webroot/jenkins/bin/jenkins.war -...

12月 04 01:43:24 centos7.local jenkins[28999]: ****************************...*
12月 04 01:43:24 centos7.local jenkins[28999]: ****************************...*
12月 04 01:43:24 centos7.local jenkins[28999]: ****************************...*
12月 04 01:43:24 centos7.local jenkins[28999]: Jenkins initial setup is req....
12月 04 01:43:24 centos7.local jenkins[28999]: Please use the following pas...:
12月 04 01:43:24 centos7.local jenkins[28999]: efad29c130da48e3980ebc59b032b8ab
12月 04 01:43:24 centos7.local jenkins[28999]: This may also be found at: /...d
12月 04 01:43:24 centos7.local jenkins[28999]: ****************************...*
12月 04 01:43:24 centos7.local jenkins[28999]: ****************************...*
12月 04 01:43:24 centos7.local jenkins[28999]: ****************************...*
Hint: Some lines were ellipsized, use -l to show in full.
起動したみたい?
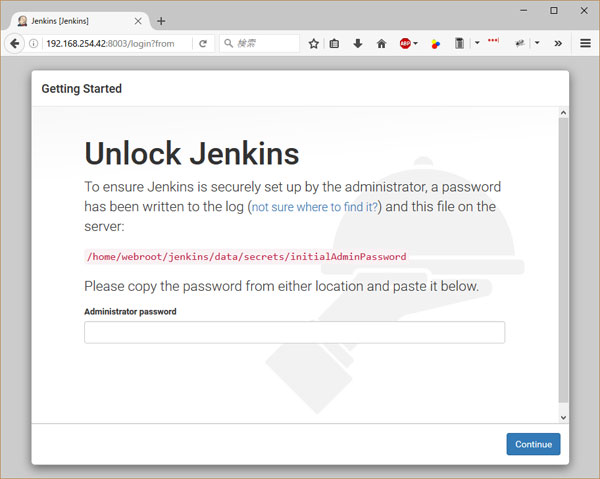
初期設定画面ですね!
参考:
Starting and Accessing Jenkins
Change JENKINS_HOME on Red Hat Linux?
apache-VirtualHost化
ASP.NET Coreアプリに加えて、GitBucketとJenkinsが稼働し始めました。
外部パートナーからのアクセスを考えて、全てapache経由で動くように調整します。
/etc/httpd/conf/httpd.confを編集して VirtualHostを3つ作ります。
dotnet.centos7.local, git.centos7.local, jenkins.centos7.local の3つのドメイン名を定義しました。
#---前回追加した箇所をコメントアウト---
#ProxyPreserveHost On
#ProxyPass / http://localhost:5000/
#ProxyPassReverse / http://localhost:5000/

#---ここから追記---
#-------------------------------------------------------
# Service dotnet.centos7.local
#-------------------------------------------------------
<VirtualHost *:80>
        ServerName dotnet.centos7.local
        ErrorLog /var/log/httpd/dotnet.centos7.local.error.log
        CustomLog /var/log/httpd/dotnet.centos7.local.access.log common

        ProxyPreserveHost On
        ProxyPass / http://localhost:5000/
        ProxyPassReverse / http://localhost:5000/
</VirtualHost>

#-------------------------------------------------------
# Service git.centos7.local
#-------------------------------------------------------
<VirtualHost *:80>
        ServerName git.centos7.local
        ErrorLog /var/log/httpd/git.centos7.local.error.log
        CustomLog /var/log/httpd/git.centos7.local.access.log common

        ProxyPreserveHost On
        ProxyPass / http://localhost:8002/
        ProxyPassReverse / http://localhost:8002/
</VirtualHost>

#-------------------------------------------------------
# Service jenkins.centos7.local
#-------------------------------------------------------
<VirtualHost *:80>
        ServerName jenkins.centos7.local
        ErrorLog /var/log/httpd/jenkins.centos7.local.error.log
        CustomLog /var/log/httpd/jenkins.centos7.local.access.log common

        ProxyPreserveHost On
        ProxyPass / http://localhost:8003/
        ProxyPassReverse / http://localhost:8003/
</VirtualHost>
開発用Windows機のhostsファイルにも、上記3ドメインを書き込みます。
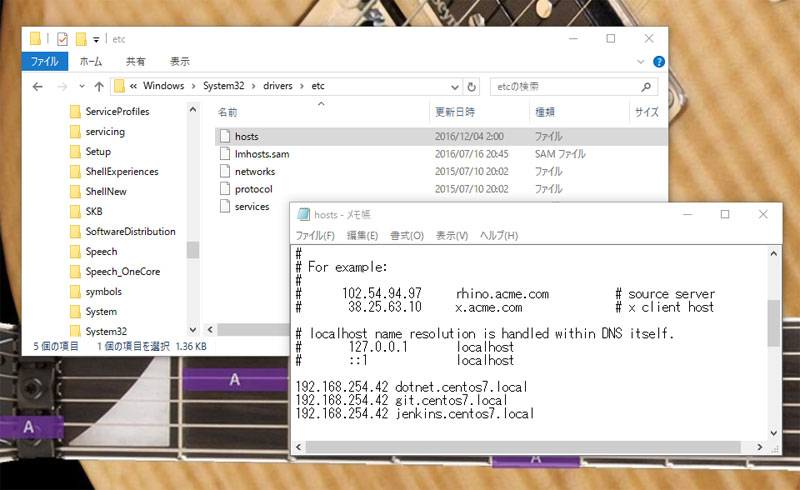
ブラウザから、確認してみましょう。
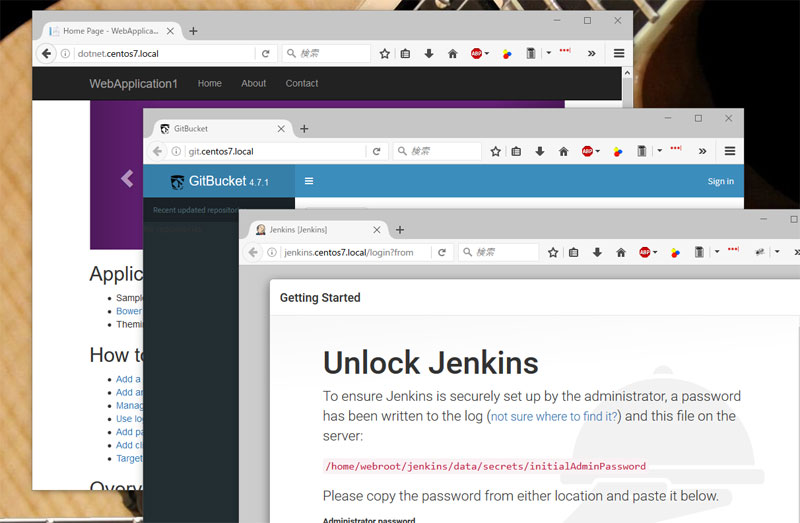
ん、おっけーです!
今回分のソースコードはこちら。
まだ、Visual Studioが生成するテンプレートのままです。
github.com
Linux(CentOS7)で、ASP.NET Coreアプリをサービス化する
ASP.NET Coreプロジェクトで、dotnet publishコマンドの動作が確認できました。
今のところdotnet runもしくはdotnet [dllファイル名]で動作確認しています。
しかし実際にサービス運用するのに、このままシェルを占有させる訳にもいきません。
PHPと違って、apache がプログラムをキックしてくれるわけでもなく。
何かの不具合で異常終了しまうと、こわい。
というわけで、OSにプログラムの面倒を見てもらえるように、サービス化します。
systemd用のサービス定義を書く
公式ドキュメントをあたると、どうやらsystemdを使うようです。
sudo nano /etc/systemd/system/kestrel-hellomvc.service の、nanoってナニソレ?と思ったら、テキストエディタなんですね。
ふむふむ、じゃviでいいや。
サービス定義ファイルを作ります。
[root@centos7 ~]# vi /etc/systemd/system/dotnet_sample.service
中身はこんな感じに。
[Unit]
    Description=Service Sample on CentOS7

    [Service]
    ExecStart=/usr/bin/dotnet /home/webroot/dotnet_sample/bin/WebApplication1.dll
    Restart=always
    RestartSec=10
    SyslogIdentifier=dotnet_sample
    User=root
    Environment=ASPNETCORE_ENVIRONMENT=Production

    [Install]
    WantedBy=multi-user.target
公式サンプルをコピペして、実行ファイルのパス、実行ユーザーなどを書き換えました。
さて、どうなるでしょう?
[root@centos7 system]# systemctl daemon-reload
[root@centos7 system]# systemctl start dotnet_sample
[root@centos7 system]# systemctl status dotnet_sample
● dotnet_sample.service - Service Sample on CentOS7
   Loaded: loaded (/etc/systemd/system/dotnet_sample.service; enabled; vendor preset: disabled)
   Active: active (running) since 土 2016-12-03 17:56:09 JST; 6s ago
 Main PID: 3618 (dotnet)
   CGroup: /system.slice/dotnet_sample.service
           mq3618 /usr/bin/dotnet /home/webroot/dotnet_sample/bin/WebApplication1.dll

12月 03 17:56:09 centos7.local systemd[1]: Started Service Sample on CentOS7.
12月 03 17:56:09 centos7.local systemd[1]: Starting Service Sample on CentOS7...
12月 03 17:56:10 centos7.local dotnet_sample[3618]: Hosting environment: Production
12月 03 17:56:10 centos7.local dotnet_sample[3618]: Content root path: /
12月 03 17:56:10 centos7.local dotnet_sample[3618]: Now listening on: http://localhost:5000
12月 03 17:56:10 centos7.local dotnet_sample[3618]: Application started. Press Ctrl+C to shut down.
あー。
一見、動いてるように見えますが、Content root path: /と出てます。
publish先のパスでなく、ルートディレクトリになっちゃってます。
前回末尾に書いた、Internal Server Errorになっちゃうヤツですね。

はい、動いていません。
実行時のカレントパスを指定しないといけませんね。
参考:
Publish to a Linux Production Environment
カレントパスは、どうやって書く?
かなり頑張ってぐぐりました。
おかげさまで、図らずもsystemdのことがざっくり飲み込めました。
どうやら、*.service ファイルでWorkingDirectoryという項目を指定できるようです。
追記してみます。
[Unit]
    Description=Service Sample on CentOS7

    [Service]
    ExecStart=/usr/bin/dotnet /home/webroot/dotnet_sample/bin/WebApplication1.dll
    WorkingDirectory=/home/webroot/dotnet_sample/bin/   # <-この行を追記
    Restart=always
    RestartSec=10
    SyslogIdentifier=dotnet_sample
    User=root
    Environment=ASPNETCORE_ENVIRONMENT=Production

    [Install]
    WantedBy=multi-user.target
どうなるでしょう?
[root@centos7 system]# systemctl stop dotnet_sample
Error: No space left on device
Warning: dotnet_sample.service changed on disk. Run 'systemctl daemon-reload' to reload units.
[root@centos7 system]# systemctl daemon-reload
[root@centos7 system]# systemctl start dotnet_sample
[root@centos7 system]# systemctl status dotnet_sample
● dotnet_sample.service - Service Sample on CentOS7
   Loaded: loaded (/etc/systemd/system/dotnet_sample.service; enabled; vendor preset: disabled)
   Active: active (running) since 土 2016-12-03 18:09:45 JST; 7s ago
 Main PID: 3698 (dotnet)
   CGroup: /system.slice/dotnet_sample.service
           mq3698 /usr/bin/dotnet /home/webroot/dotnet_sample/bin/WebApplication1.dll

12月 03 18:09:45 centos7.local systemd[1]: Started Service Sample on CentOS7.
12月 03 18:09:45 centos7.local systemd[1]: Starting Service Sample on CentOS7...
12月 03 18:09:45 centos7.local dotnet_sample[3698]: Hosting environment: Production
12月 03 18:09:45 centos7.local dotnet_sample[3698]: Content root path: /home/webroot/dotnet_sample/bin
12月 03 18:09:45 centos7.local dotnet_sample[3698]: Now listening on: http://localhost:5000
12月 03 18:09:45 centos7.local dotnet_sample[3698]: Application started. Press Ctrl+C to shut down.
おっ。パスがセットできてますね!
動作はいかが?
 動きましたね~~!
参考:
Executing chdir before starting systemd service
実行権限をapacheに変える
いつまでも、rootで動かしてちゃダメですよね。一応公開を前提にするわけで。
というわけで、apacheユーザーで動作するように、設定を見直します。
dotnet_sample.serviceファイルより、実行ユーザーを変更します。
[Unit]
    Description=Service Sample on CentOS7

    [Service]
    ExecStart=/usr/bin/dotnet /home/webroot/dotnet_sample/bin/WebApplication1.dll
    WorkingDirectory=/home/webroot/dotnet_sample/bin/
    Restart=always
    RestartSec=10
    SyslogIdentifier=dotnet_sample
#    User=root
    User=apache
    Environment=ASPNETCORE_ENVIRONMENT=Production

    [Install]
    WantedBy=multi-user.target
これでいいはず...?
[root@centos7 system]# systemctl stop dotnet_sample
Warning: dotnet_sample.service changed on disk. Run 'systemctl daemon-reload' to reload units.
[root@centos7 system]# systemctl daemon-reload
[root@centos7 system]# systemctl start dotnet_sample
[root@centos7 system]# systemctl status dotnet_sample
● dotnet_sample.service - Service Sample on CentOS7
   Loaded: loaded (/etc/systemd/system/dotnet_sample.service; enabled; vendor preset: disabled)
   Active: activating (auto-restart) (Result: exit-code) since 土 2016-12-03 18:19:50 JST; 3s ago
  Process: 3748 ExecStart=/usr/bin/dotnet /home/webroot/dotnet_sample/bin/WebApplication1.dll (code=exited, status=203/EXEC)
 Main PID: 3748 (code=exited, status=203/EXEC)

12月 03 18:19:50 centos7.local systemd[1]: Unit dotnet_sample.service entered failed state.
12月 03 18:19:50 centos7.local systemd[1]: dotnet_sample.service failed.
あらー。起動出来なかった...。
原因なんだっけなーと、諸々探してみますと。
[root@centos7 dotnet]# pwd
/opt/dotnet
[root@centos7 dotnet]# ls -alF
合計 148
drwxr-xr-x. 5 root root     99 12月  2 16:35 ./
drwxr-xr-x. 3 root root     19 12月  2 16:31 ../
-rwxr--r--. 1 root root   9410 11月  3 08:49 LICENSE.txt*
-rwxr--r--. 1 root root   8103 11月  3 08:49 ThirdPartyNotices.txt*
-rwxr--r--. 1 root root 128693 11月  9 06:52 dotnet*
drwxr-xr-x. 3 root root     16 12月  2 16:35 host/
drwxr-xr-x. 4 root root     64 12月  2 16:52 sdk/
drwxr-xr-x. 3 root root     34 12月  2 16:35 shared/
あらっ。
dotnetコマンド実体ファイルの権限が、root以外で実行出来なくなってますやん。
こらあかん。
全員が実行出来るよう、サブフォルダを含めて一括修正します。
[root@centos7 dotnet]# cd ../
[root@centos7 opt]# pwd
/opt
[root@centos7 opt]# chmod -Rf 755 ./dotnet
どやっ?
[root@centos7 system]# systemctl stop dotnet_service
Failed to stop dotnet_service.service: Unit dotnet_service.service not loaded.
[root@centos7 system]# systemctl start dotnet_sample
[root@centos7 system]# systemctl status dotnet_sample
● dotnet_sample.service - Service Sample on CentOS7
   Loaded: loaded (/etc/systemd/system/dotnet_sample.service; enabled; vendor preset: disabled)
   Active: active (running) since 土 2016-12-03 18:30:04 JST; 1min 1s ago
 Main PID: 3875 (dotnet)
   CGroup: /system.slice/dotnet_sample.service
           mq3875 /usr/bin/dotnet /home/webroot/dotnet_sample/bin/WebApplication1.dll

12月 03 18:30:04 centos7.local systemd[1]: Started Service Sample on CentOS7.
12月 03 18:30:04 centos7.local systemd[1]: Starting Service Sample on CentOS7...
12月 03 18:30:04 centos7.local dotnet_sample[3875]: Hosting environment: Production
12月 03 18:30:04 centos7.local dotnet_sample[3875]: Content root path: /home/webroot/dotnet_sample/bin
12月 03 18:30:04 centos7.local dotnet_sample[3875]: Now listening on: http://localhost:5000
12月 03 18:30:04 centos7.local dotnet_sample[3875]: Application started. Press Ctrl+C to shut down.
12月 03 18:31:02 centos7.local systemd[1]: Started Service Sample on CentOS7.
おっしゃ!
イケましたな。
dotnetプロセスを殺してみる
これで、dotnet_sampleサービスが死んでもsystemdが再起動してくれる、はずです。
試してみます...。
[root@centos7 ~]# ps -A | grep dotnet
  3875 ?        00:00:00 dotnet
[root@centos7 ~]# kill 3875
-->(dotnet_sample.serviceファイルの RestartSec設定どおり、10秒待ってから)-->
[root@centos7 ~]# ps -A | grep dotnet
  3914 ?        00:00:00 dotnet
大丈夫!理不尽に殺害されても、生き返ります!
ちなみに、supervisorだと?
systemdが標準化する以前は、プロセス監視にsupervisorを使ってた、ようです。
や、すいません。
LinuxだとPHPオンリーで、監視が必要なサービスは書いたこと無かったんです...。
CentOS7では、yum install supervisorでインストールできました。
設定ファイルは/etc/supervisord.d/[各種サービス].iniに書きます。
こちらを参考に、こんな感じで動きました。
[program:dotnet_sample]
directory=/home/webroot/dotnet_sample/bin/
command=dotnet /home/webroot/dotnet_sample/bin/WebApplication1.dll
user=apache  ; 起動ユーザ
autostart=true
autorestart=true  ; プロセスダウン時に自動再起動
stdout_logfile=/var/log/supervisor/dotnet_sample.out.log ; 標準出力ログ
stderr_logfile=/var/log/supervisor/dotnet_sample.err.log
stdout_logfile_maxbytes=1MB
stdout_logfile_backups=5
stdout_capture_maxbytes=1MB
redirect_stderr=true  ; エラー出力を標準出力にリダイレクト
environment=Hosting__Environment=Production,HOME=/home/webroot/dotnet_sample/bin/
stopsignal=INT
参考:
ASP.NET Core アプリを Ubuntu サーバーで公開
今回分のソースコードはこちら。
まだ、Visual Studioが生成するテンプレートのままです。
github.com
Linux(CentOS7)で、ASP.NET Coreアプリを公開(publish)する
ASP.NET Coreプロジェクトをdotnet runコマンドで実行し、動作確認が出来ました。
でもちょっと、環境が乱雑。
いずれアプリケーションを公開する(はず)なので、環境を整備します。
フォルダ構成を整理
前回は、手早く動作確認するため/home/sampleにファイル一式をコピペしました。
しかし今後、自社PHPサービスや GitBucket、Jenkins を平行稼働する予定なので、Webをまとめたフォルダ/home/webrootの配下に持っていきます。
[root@centos7 ~]# mkdir -p /home/webroot/dotnet_sample/bin
[root@centos7 ~]# mv /home/sample /home/webroot/dotnet_sample/src
publishコマンドを試す
dotnet run/dotnet buildは [プロジェクト]/bin 下にバイナリを生成してくれますが、実行に必要な全ての依存dllを書き出してくれるわけではありません。
バイナリ一式を全て出力するには、dotnet publishコマンドを実行します。
詳しくはこちらに記述がありました。日本語じゃーん!さんくす!
早速、Releaseビルドを指定パスに書き出してみます。
[root@centos7 ~]# cd /home/webroot/dotnet_sample/src/src/WebApplication1
[root@centos7 WebApplication1]# dotnet publish --configuration Release --output
/home/webroot/dotnet_sample/bin/
Publishing WebApplication1 for .NETCoreApp,Version=v1.0
No executable found matching command "bower"
ん?
bowerって何よ?
参考:
dotnet-publish
publish環境をつくろう
エラーメッセージでぐぐると、まんまのがありました。
GonzRuさんの回答で、npm経由のインストール手順があります。
npm install -g bower
npm install -g gulp
npmって、node.jsのナニヤラでしたっけね?
とりあえず、npmを入れます。
[root@centos7 WebApplication1]# yum -y install npm
読み込んだプラグイン:fastestmirror
base                                                     | 3.6 kB     00:00
extras                                                   | 3.4 kB     00:00
updates                                                  | 3.4 kB     00:00
Loading mirror speeds from cached hostfile
 * base: www.ftp.ne.jp
 * extras: www.ftp.ne.jp
 * updates: www.ftp.ne.jp
パッケージ npm は利用できません。
エラー: 何もしません
あっ。ないですか。
ざっとぐぐると、こういうのやこういうのが当たってきます。なるほど、epelにパッケージがあるなら、今後も安心ですね。
早速、yum-epelリポジトリを入れてから再度試します。
[root@centos7 WebApplication1]# yum install epel-release
読み込んだプラグイン:fastestmirror
Loading mirror speeds from cached hostfile
 * base: www.ftp.ne.jp
 * extras: www.ftp.ne.jp
 * updates: www.ftp.ne.jp
依存性の解決をしています
--> トランザクションの確認を実行しています。
---> パッケージ epel-release.noarch 0:7-6 を インストール
--> 依存性解決を終了しました。

依存性を解決しました

================================================================================
 Package                アーキテクチャー バージョン      リポジトリー      容量
================================================================================
インストール中:
 epel-release           noarch           7-6             extras            14 k

トランザクションの要約
================================================================================
インストール  1 パッケージ

総ダウンロード容量: 14 k
インストール容量: 24 k
Is this ok [y/d/N]: y
Downloading packages:
epel-release-7-6.noarch.rpm                                |  14 kB   00:00
Running transaction check
Running transaction test
Transaction test succeeded
Running transaction
  インストール中          : epel-release-7-6.noarch                         1/1
  検証中                  : epel-release-7-6.noarch                         1/1

インストール:
  epel-release.noarch 0:7-6

完了しました!
[root@centos7 WebApplication1]# yum -y install npm
読み込んだプラグイン:fastestmirror
epel/x86_64/metalink                                     | 5.0 kB     00:00
epel                                                     | 4.3 kB     00:00
epel/x86_64/primary_db         FAILED
http://ftp.cuhk.edu.hk/pub/linux/fedora-epel/7/x86_64/repodata/64def14d57e00e2fddbbbbc5be92792cd03fedbb047dd9929ebfe1cf7025ca84-primary.sqlite.xz: [Errno 14] HTTP Error 404 - Not Found
他のミラーを試します。
To address this issue please refer to the below knowledge base article

https://access.redhat.com/articles/1320623

If above article doesn't help to resolve this issue please create a bug on https://bugs.centos.org/

(1/3): epel/x86_64/group_gz                                | 170 kB   00:00
(2/3): epel/x86_64/updateinfo                              | 681 kB   00:01
(3/3): epel/x86_64/primary_db                              | 4.4 MB   00:03
Loading mirror speeds from cached hostfile
 * base: www.ftp.ne.jp
 * epel: free.nchc.org.tw
 * extras: www.ftp.ne.jp
 * updates: www.ftp.ne.jp
依存性の解決をしています
--> トランザクションの確認を実行しています。
---> パッケージ npm.x86_64 1:3.10.8-1.6.9.1.4.el7 を インストール
--> 依存性の処理をしています: nodejs = 1:6.9.1-4.el7 のパッケージ: 1:npm-3.10.8-1.6.9.1.4.el7.x86_64
--> トランザクションの確認を実行しています。
---> パッケージ nodejs.x86_64 1:6.9.1-4.el7 を インストール
--> 依存性の処理をしています: libuv >= 1:1.9.1 のパッケージ: 1:nodejs-6.9.1-4.el7.x86_64
--> 依存性の処理をしています: libuv.so.1()(64bit) のパッケージ: 1:nodejs-6.9.1-4.el7.x86_64
--> トランザクションの確認を実行しています。
---> パッケージ libuv.x86_64 1:1.9.1-1.el7 を インストール
--> 依存性解決を終了しました。

依存性を解決しました

================================================================================
 Package       アーキテクチャー
                             バージョン                       リポジトリー
                                                                           容量
================================================================================
インストール中:
 npm           x86_64        1:3.10.8-1.6.9.1.4.el7           epel        2.4 M
依存性関連でのインストールをします:
 libuv         x86_64        1:1.9.1-1.el7                    epel         79 k
 nodejs        x86_64        1:6.9.1-4.el7                    epel        4.6 M

トランザクションの要約
================================================================================
インストール  1 パッケージ (+2 個の依存関係のパッケージ)

総ダウンロード容量: 7.1 M
インストール容量: 26 M
Downloading packages:
警告: /var/cache/yum/x86_64/7/epel/packages/nodejs-6.9.1-4.el7.x86_64.rpm: ヘッ ダー V3 RSA/SHA256 Signature、鍵 ID 352c64e5: NOKEY
nodejs-6.9.1-4.el7.x86_64.rpm の公開鍵がインストールされていません
(1/3): nodejs-6.9.1-4.el7.x86_64.rpm                       | 4.6 MB   00:01
(2/3): npm-3.10.8-1.6.9.1.4.el7.x86_64.rpm                 | 2.4 MB   00:01
(3/3): libuv-1.9.1-1.el7.x86_64.rpm                        |  79 kB   00:02
--------------------------------------------------------------------------------
合計                                               3.0 MB/s | 7.1 MB  00:02
file:///etc/pki/rpm-gpg/RPM-GPG-KEY-EPEL-7 から鍵を取得中です。
Importing GPG key 0x352C64E5:
 Userid     : "Fedora EPEL (7) <epel@fedoraproject.org>"
 Fingerprint: 91e9 7d7c 4a5e 96f1 7f3e 888f 6a2f aea2 352c 64e5
 Package    : epel-release-7-6.noarch (@extras)
 From       : /etc/pki/rpm-gpg/RPM-GPG-KEY-EPEL-7
Running transaction check
Running transaction test
Transaction test succeeded
Running transaction
  インストール中          : 1:libuv-1.9.1-1.el7.x86_64                      1/3
  インストール中          : 1:npm-3.10.8-1.6.9.1.4.el7.x86_64               2/3
  インストール中          : 1:nodejs-6.9.1-4.el7.x86_64                     3/3
  検証中                  : 1:nodejs-6.9.1-4.el7.x86_64                     1/3
  検証中                  : 1:libuv-1.9.1-1.el7.x86_64                      2/3
  検証中                  : 1:npm-3.10.8-1.6.9.1.4.el7.x86_64               3/3

インストール:
  npm.x86_64 1:3.10.8-1.6.9.1.4.el7

依存性関連をインストールしました:
  libuv.x86_64 1:1.9.1-1.el7             nodejs.x86_64 1:6.9.1-4.el7

完了しました!
さて、npm経由でbowerとgulpを入れていれてみます。
[root@centos7 WebApplication1]# npm install -g bower
/usr/bin/bower -> /usr/lib/node_modules/bower/bin/bower
/usr/lib
mqq bower@1.8.0

[root@centos7 WebApplication1]# npm install -g gulp
npm WARN deprecated minimatch@2.0.10: Please update to minimatch 3.0.2 or higher to avoid a RegExp DoS issue
npm WARN deprecated minimatch@0.2.14: Please update to minimatch 3.0.2 or higher to avoid a RegExp DoS issue
npm WARN deprecated graceful-fs@1.2.3: graceful-fs v3.0.0 and before will fail on node releases >= v7.0. Please update to graceful-fs@^4.0.0 as soon as possible. Use 'npm ls graceful-fs' to find it in the tree.
/usr/bin/gulp -> /usr/lib/node_modules/gulp/bin/gulp.js
/usr/lib
mqw gulp@3.9.1
  tqq archy@1.0.0
  tqw chalk@1.1.3
  x tqq ansi-styles@2.2.1
  x tqq escape-string-regexp@1.0.5
  x tqw has-ansi@2.0.0
  x x mqq ansi-regex@2.0.0
  x tqq strip-ansi@3.0.1
  x mqq supports-color@2.0.0
  tqq deprecated@0.0.1
  tqw gulp-util@3.0.7
  x tqq array-differ@1.0.0
  x tqq array-uniq@1.0.3
  x tqq beeper@1.1.1
  x tqw dateformat@1.0.12
  x x tqq get-stdin@4.0.1
  x x mqw meow@3.7.0
  x x   tqw camelcase-keys@2.1.0
  x x   x mqq camelcase@2.1.1
  x x   tqq decamelize@1.2.0
  x x   tqw loud-rejection@1.6.0
  x x   x tqw currently-unhandled@0.4.1
  x x   x x mqq array-find-index@1.0.2
  x x   x mqq signal-exit@3.0.1
  x x   tqq map-obj@1.0.1
  x x   tqw normalize-package-data@2.3.5
  x x   x tqq hosted-git-info@2.1.5
  x x   x tqw is-builtin-module@1.0.0
  x x   x x mqq builtin-modules@1.1.1
  x x   x mqw validate-npm-package-license@3.0.1
  x x   x   tqw spdx-correct@1.0.2
  x x   x   x mqq spdx-license-ids@1.2.2
  x x   x   mqq spdx-expression-parse@1.0.4
  x x   tqq object-assign@4.1.0
  x x   tqw read-pkg-up@1.0.1
  x x   x tqw find-up@1.1.2
  x x   x x tqq path-exists@2.1.0
  x x   x x mqw pinkie-promise@2.0.1
  x x   x x   mqq pinkie@2.0.4
  x x   x mqw read-pkg@1.1.0
  x x   x   tqw load-json-file@1.1.0
  x x   x   x tqq graceful-fs@4.1.11
  x x   x   x tqw parse-json@2.2.0
  x x   x   x x mqw error-ex@1.3.0
  x x   x   x x   mqq is-arrayish@0.2.1
  x x   x   x tqq pify@2.3.0
  x x   x   x mqq strip-bom@2.0.0
  x x   x   mqq path-type@1.1.0
  x x   tqw redent@1.0.0
  x x   x tqw indent-string@2.1.0
  x x   x x mqw repeating@2.0.1
  x x   x x   mqw is-finite@1.0.2
  x x   x x     mqq number-is-nan@1.0.1
  x x   x mqq strip-indent@1.0.1
  x x   mqq trim-newlines@1.0.0
  x tqw fancy-log@1.2.0
  x x mqq time-stamp@1.0.1
  x tqw gulplog@1.0.0
  x x mqq glogg@1.0.0
  x tqw has-gulplog@0.1.0
  x x mqq sparkles@1.0.0
  x tqq lodash._reescape@3.0.0
  x tqq lodash._reevaluate@3.0.0
  x tqq lodash._reinterpolate@3.0.0
  x tqw lodash.template@3.6.2
  x x tqq lodash._basecopy@3.0.1
  x x tqq lodash._basetostring@3.0.1
  x x tqq lodash._basevalues@3.0.0
  x x tqq lodash._isiterateecall@3.0.9
  x x tqw lodash.escape@3.2.0
  x x x mqq lodash._root@3.0.1
  x x tqw lodash.keys@3.1.2
  x x x tqq lodash._getnative@3.9.1
  x x x tqq lodash.isarguments@3.1.0
  x x x mqq lodash.isarray@3.0.4
  x x tqq lodash.restparam@3.6.1
  x x mqq lodash.templatesettings@3.1.1
  x tqw multipipe@0.1.2
  x x mqw duplexer2@0.0.2
  x x   mqq readable-stream@1.1.14
  x tqq object-assign@3.0.0
  x tqq replace-ext@0.0.1
  x tqw through2@2.0.3
  x x tqw readable-stream@2.2.2
  x x x tqq buffer-shims@1.0.0
  x x x tqq core-util-is@1.0.2
  x x x tqq inherits@2.0.3
  x x x tqq isarray@1.0.0
  x x x tqq process-nextick-args@1.0.7
  x x x tqq string_decoder@0.10.31
  x x x mqq util-deprecate@1.0.2
  x x mqq xtend@4.0.1
  x mqw vinyl@0.5.3
  x   tqq clone@1.0.2
  x   mqq clone-stats@0.0.1
  tqq interpret@1.0.1
  tqw liftoff@2.3.0
  x tqq extend@3.0.0
  x tqw findup-sync@0.4.3
  x x tqw detect-file@0.1.0
  x x x mqq fs-exists-sync@0.1.0
  x x tqw is-glob@2.0.1
  x x x mqq is-extglob@1.0.0
  x x tqw micromatch@2.3.11
  x x x tqw arr-diff@2.0.0
  x x x x mqq arr-flatten@1.0.1
  x x x tqq array-unique@0.2.1
  x x x tqw braces@1.8.5
  x x x x tqw expand-range@1.8.2
  x x x x x mqw fill-range@2.2.3
  x x x x x   tqq is-number@2.1.0
  x x x x x   tqw isobject@2.1.0
  x x x x x   x mqq isarray@1.0.0
  x x x x x   tqq randomatic@1.1.6
  x x x x x   mqq repeat-string@1.6.1
  x x x x tqq preserve@0.2.0
  x x x x mqq repeat-element@1.1.2
  x x x tqw expand-brackets@0.1.5
  x x x x mqq is-posix-bracket@0.1.1
  x x x tqq extglob@0.3.2
  x x x tqq filename-regex@2.0.0
  x x x tqw kind-of@3.0.4
  x x x x mqq is-buffer@1.1.4
  x x x tqq normalize-path@2.0.1
  x x x tqw object.omit@2.0.1
  x x x x tqw for-own@0.1.4
  x x x x x mqq for-in@0.1.6
  x x x x mqq is-extendable@0.1.1
  x x x tqw parse-glob@3.0.4
  x x x x tqw glob-base@0.3.0
  x x x x x mqq glob-parent@2.0.0
  x x x x mqq is-dotfile@1.0.2
  x x x mqw regex-cache@0.4.3
  x x x   tqq is-equal-shallow@0.1.3
  x x x   mqq is-primitive@2.0.0
  x x mqw resolve-dir@0.1.1
  x x   mqw global-modules@0.2.3
  x x     tqw global-prefix@0.1.5
  x x     x tqw homedir-polyfill@1.0.1
  x x     x x mqq parse-passwd@1.0.0
  x x     x tqq ini@1.3.4
  x x     x mqw which@1.2.12
  x x     x   mqq isexe@1.1.2
  x x     mqq is-windows@0.2.0
  x tqw fined@1.0.2
  x x tqq expand-tilde@1.2.2
  x x tqq lodash.assignwith@4.2.0
  x x tqq lodash.isempty@4.4.0
  x x tqq lodash.pick@4.4.0
  x x mqw parse-filepath@1.0.1
  x x   tqw is-absolute@0.2.6
  x x   x mqw is-relative@0.2.1
  x x   x   mqw is-unc-path@0.1.1
  x x   x     mqq unc-path-regex@0.1.2
  x x   tqq map-cache@0.2.2
  x x   mqw path-root@0.1.1
  x x     mqq path-root-regex@0.1.2
  x tqq flagged-respawn@0.3.2
  x tqq lodash.isplainobject@4.0.6
  x tqq lodash.isstring@4.0.1
  x tqq lodash.mapvalues@4.6.0
  x tqq rechoir@0.6.2
  x mqq resolve@1.1.7
  tqq minimist@1.2.0
  tqw orchestrator@0.3.8
  x tqw end-of-stream@0.1.5
  x x mqw once@1.3.3
  x x   mqq wrappy@1.0.2
  x tqq sequencify@0.0.7
  x mqq stream-consume@0.1.0
  tqq pretty-hrtime@1.0.3
  tqq semver@4.3.6
  tqw tildify@1.2.0
  x mqq os-homedir@1.0.2
  tqw v8flags@2.0.11
  x mqq user-home@1.1.1
  mqw vinyl-fs@0.3.14
    tqq defaults@1.0.3
    tqw glob-stream@3.1.18
    x tqw glob@4.5.3
    x x mqq inflight@1.0.6
    x tqw glob2base@0.0.12
    x x mqq find-index@0.1.1
    x tqw minimatch@2.0.10
    x x mqw brace-expansion@1.1.6
    x x   tqq balanced-match@0.4.2
    x x   mqq concat-map@0.0.1
    x tqq ordered-read-streams@0.1.0
    x tqw through2@0.6.5
    x x mqq readable-stream@1.0.34
    x mqq unique-stream@1.0.0
    tqw glob-watcher@0.0.6
    x mqw gaze@0.5.2
    x   mqw globule@0.1.0
    x     tqw glob@3.1.21
    x     x tqq graceful-fs@1.2.3
    x     x mqq inherits@1.0.2
    x     tqq lodash@1.0.2
    x     mqw minimatch@0.2.14
    x       tqq lru-cache@2.7.3
    x       mqq sigmund@1.0.1
    tqw graceful-fs@3.0.11
    x mqq natives@1.1.0
    tqw mkdirp@0.5.1
    x mqq minimist@0.0.8
    tqw strip-bom@1.0.0
    x tqq first-chunk-stream@1.0.0
    x mqq is-utf8@0.2.1
    tqw through2@0.6.5
    x mqw readable-stream@1.0.34
    x   mqq isarray@0.0.1
    mqw vinyl@0.4.6
      mqq clone@0.2.0
何か警告出てる気がするけど。publishに使うだけだし、まあいいんじゃないかな(適当)
じゃあ、改めて。publishしてみます。
[root@centos7 WebApplication1]# dotnet publish --configuration Release --output /home/webroot/dotnet_sample/bin/
Publishing WebApplication1 for .NETCoreApp,Version=v1.0
bower ESUDO         Cannot be run with sudo
Additional error details:
Since bower is a user command, there is no need to execute it with superuser permissions.
If you're having permission errors when using bower without sudo, please spend a few minutes learning more about how your system should work and make any necessary repairs.
http://www.joyent.com/blog/installing-node-and-npm
https://gist.github.com/isaacs/579814
You can however run a command with sudo using --allow-root option
Bundling with configuration from /home/webroot/dotnet_sample/src/src/WebApplication1/bundleconfig.json
Processing wwwroot/css/site.min.css
  Bundled
  Minified
Processing wwwroot/js/site.min.js
  Bundled
Project WebApplication1 (.NETCoreApp,Version=v1.0) will be compiled because expected outputs are missing
Compiling WebApplication1 for .NETCoreApp,Version=v1.0

Compilation succeeded.
    0 Warning(s)
    0 Error(s)

Time elapsed 00:00:01.9241647


Configuring the following project for use with IIS: '/home/webroot/dotnet_sample/bin/'
Updating web.config at '/home/webroot/dotnet_sample/bin/web.config'
Configuring project completed successfully
お~~~。できたっぽい。
どれどれ?
[root@centos7 WebApplication1]# ls -alF /home/webroot/dotnet_sample/bin
合計 5260
drwxr-xr-x 5 root root   8192 12月  3 13:26 ./
drwxr-xr-x 4 root root     26 12月  3 12:05 ../
-rwxr--r-- 1 root root  50680  8月 31 17:26 Microsoft.AspNetCore.Antiforgery.dll*
-rwxr--r-- 1 root root  38400  6月 22 09:14 Microsoft.AspNetCore.Authorization.dll*
-rwxr--r-- 1 root root  31744  6月 22 09:14 Microsoft.AspNetCore.Cors.dll*
-rwxr--r-- 1 root root  40952  6月 22 09:14 Microsoft.AspNetCore.Cryptography.Internal.dll*
-rwxr--r-- 1 root root  21504  6月 22 09:14 Microsoft.AspNetCore.DataProtection.Abstractions.dll*
-rwxr--r-- 1 root root 143360  6月 22 09:14 Microsoft.AspNetCore.DataProtection.dll*
-rwxr--r-- 1 root root  16376  6月 22 09:14 Microsoft.AspNetCore.Diagnostics.Abstractions.dll*
-rwxr--r-- 1 root root 205312  6月 22 09:14 Microsoft.AspNetCore.Diagnostics.dll*
-rwxr--r-- 1 root root  19968  6月 22 09:14 Microsoft.AspNetCore.Hosting.Abstractions.dll*
-rwxr--r-- 1 root root  15352  6月 22 09:14 Microsoft.AspNetCore.Hosting.Server.Abstractions.dll*
-rwxr--r-- 1 root root  68608  6月 22 09:14 Microsoft.AspNetCore.Hosting.dll*
-rwxr--r-- 1 root root  19968  6月 22 09:14 Microsoft.AspNetCore.Html.Abstractions.dll*
-rwxr--r-- 1 root root  61432  6月 22 09:14 Microsoft.AspNetCore.Http.Abstractions.dll*
-rwxr--r-- 1 root root  37888  6月 22 09:14 Microsoft.AspNetCore.Http.Extensions.dll*
-rwxr--r-- 1 root root  30720  6月 22 09:14 Microsoft.AspNetCore.Http.Features.dll*
-rwxr--r-- 1 root root  80384  6月 22 09:14 Microsoft.AspNetCore.Http.dll*
-rwxr--r-- 1 root root  25600  6月 22 09:14 Microsoft.AspNetCore.HttpOverrides.dll*
-rwxr--r-- 1 root root  45568  6月 22 09:14 Microsoft.AspNetCore.JsonPatch.dll*
-rwxr--r-- 1 root root  26104  6月 22 09:14 Microsoft.AspNetCore.Localization.dll*
-rwxr--r-- 1 root root  89080  8月 31 17:26 Microsoft.AspNetCore.Mvc.Abstractions.dll*
-rwxr--r-- 1 root root  42488  8月 31 17:26 Microsoft.AspNetCore.Mvc.ApiExplorer.dll*
-rwxr--r-- 1 root root 390648  8月 31 17:26 Microsoft.AspNetCore.Mvc.Core.dll*
-rwxr--r-- 1 root root  23544  8月 31 17:26 Microsoft.AspNetCore.Mvc.Cors.dll*
-rwxr--r-- 1 root root  44024  8月 31 17:26 Microsoft.AspNetCore.Mvc.DataAnnotations.dll*
-rwxr--r-- 1 root root  32248  8月 31 17:26 Microsoft.AspNetCore.Mvc.Formatters.Json.dll*
-rwxr--r-- 1 root root  30200  8月 31 17:26 Microsoft.AspNetCore.Mvc.Localization.dll*
-rwxr--r-- 1 root root  55288  8月 31 17:26 Microsoft.AspNetCore.Mvc.Razor.Host.dll*
-rwxr--r-- 1 root root 121848  8月 31 17:26 Microsoft.AspNetCore.Mvc.Razor.dll*
-rwxr--r-- 1 root root 103928  8月 31 17:26 Microsoft.AspNetCore.Mvc.TagHelpers.dll*
-rwxr--r-- 1 root root 242168  8月 31 17:26 Microsoft.AspNetCore.Mvc.ViewFeatures.dll*
-rwxr--r-- 1 root root  24568  8月 31 17:26 Microsoft.AspNetCore.Mvc.dll*
-rwxr--r-- 1 root root  83960  6月 22 09:14 Microsoft.AspNetCore.Razor.Runtime.dll*
-rwxr--r-- 1 root root 297976  6月 22 09:14 Microsoft.AspNetCore.Razor.dll*
-rwxr--r-- 1 root root  36344  8月 31 17:26 Microsoft.AspNetCore.Routing.Abstractions.dll*
-rwxr--r-- 1 root root 104440  8月 31 17:26 Microsoft.AspNetCore.Routing.dll*
-rwxr--r-- 1 root root  27648  6月 22 09:14 Microsoft.AspNetCore.Server.IISIntegration.dll*
-rwxr--r-- 1 root root 247288  8月 31 17:26 Microsoft.AspNetCore.Server.Kestrel.dll*
-rwxr--r-- 1 root root  68608  6月 22 09:14 Microsoft.AspNetCore.StaticFiles.dll*
-rwxr--r-- 1 root root  62456  6月 22 09:14 Microsoft.AspNetCore.WebUtilities.dll*
-rwxr--r-- 1 root root  23616  6月 21 21:04 Microsoft.DotNet.InternalAbstractions.dll*
-rwxr--r-- 1 root root  25600  6月 22 09:14 Microsoft.Extensions.Caching.Abstractions.dll*
-rwxr--r-- 1 root root  29688  6月 22 09:14 Microsoft.Extensions.Caching.Memory.dll*
-rwxr--r-- 1 root root  19456  6月 22 09:14 Microsoft.Extensions.Configuration.Abstractions.dll*
-rwxr--r-- 1 root root  22520  6月 22 09:14 Microsoft.Extensions.Configuration.Binder.dll*
-rwxr--r-- 1 root root  19960  6月 22 09:14 Microsoft.Extensions.Configuration.EnvironmentVariables.dll*
-rwxr--r-- 1 root root  18432  6月 22 09:14 Microsoft.Extensions.Configuration.FileExtensions.dll*
-rwxr--r-- 1 root root  24056  6月 22 09:14 Microsoft.Extensions.Configuration.Json.dll*
-rwxr--r-- 1 root root  24576  6月 22 09:14 Microsoft.Extensions.Configuration.dll*
-rwxr--r-- 1 root root  35840  6月 22 09:14 Microsoft.Extensions.DependencyInjection.Abstractions.dll*
-rwxr--r-- 1 root root  37368  6月 22 09:14 Microsoft.Extensions.DependencyInjection.dll*
-rwxr--r-- 1 root root  57408  6月 21 21:04 Microsoft.Extensions.DependencyModel.dll*
-rwxr--r-- 1 root root  18936  6月 22 09:14 Microsoft.Extensions.FileProviders.Abstractions.dll*
-rwxr--r-- 1 root root  18432  6月 22 09:14 Microsoft.Extensions.FileProviders.Composite.dll*
-rwxr--r-- 1 root root  27648  6月 22 09:14 Microsoft.Extensions.FileProviders.Physical.dll*
-rwxr--r-- 1 root root  35328  6月 22 09:14 Microsoft.Extensions.FileSystemGlobbing.dll*
-rwxr--r-- 1 root root  15872  6月 22 09:14 Microsoft.Extensions.Globalization.CultureInfoCache.dll*
-rwxr--r-- 1 root root  16896  6月 22 09:14 Microsoft.Extensions.Localization.Abstractions.dll*
-rwxr--r-- 1 root root  26624  6月 22 09:14 Microsoft.Extensions.Localization.dll*
-rwxr--r-- 1 root root  43512  6月 22 09:14 Microsoft.Extensions.Logging.Abstractions.dll*
-rwxr--r-- 1 root root  27640  6月 22 09:14 Microsoft.Extensions.Logging.Console.dll*
-rwxr--r-- 1 root root  16376  6月 22 09:14 Microsoft.Extensions.Logging.Debug.dll*
-rwxr--r-- 1 root root  18424  6月 22 09:14 Microsoft.Extensions.Logging.dll*
-rwxr--r-- 1 root root  17912  6月 22 09:14 Microsoft.Extensions.ObjectPool.dll*
-rwxr--r-- 1 root root  15872  6月 22 09:14 Microsoft.Extensions.Options.ConfigurationExtensions.dll*
-rwxr--r-- 1 root root  20480  6月 22 09:14 Microsoft.Extensions.Options.dll*
-rwxr--r-- 1 root root  16384  6月 22 09:14 Microsoft.Extensions.PlatformAbstractions.dll*
-rwxr--r-- 1 root root  27648  6月 22 09:14 Microsoft.Extensions.Primitives.dll*
-rwxr--r-- 1 root root  19456  6月 22 09:14 Microsoft.Extensions.WebEncoders.dll*
-rwxr--r-- 1 root root  63992  6月 22 09:14 Microsoft.Net.Http.Headers.dll*
-rwxr--r-- 1 root root  18432  6月 22 09:14 Microsoft.VisualStudio.Web.BrowserLink.Loader.dll*
-rwxr--r-- 1 root root 468480  6月 13 23:06 Newtonsoft.Json.dll*
-rwxr--r-- 1 root root  88472  6月 11 23:13 System.Collections.NonGeneric.dll*
-rwxr--r-- 1 root root  46488  6月 11 23:13 System.Collections.Specialized.dll*
-rwxr--r-- 1 root root  36256  6月 11 23:13 System.ComponentModel.Primitives.dll*
-rwxr--r-- 1 root root 121776  6月 11 23:13 System.ComponentModel.TypeConverter.dll*
-rwxr--r-- 1 root root  22928  6月 11 23:13 System.Diagnostics.Contracts.dll*
-rwxr--r-- 1 root root  30584  6月 11 23:14 System.Net.WebSockets.dll*
-rwxr--r-- 1 root root  29632  6月 11 23:14 System.Runtime.Serialization.Primitives.dll*
-rwxr--r-- 1 root root  64232  6月 11 23:14 System.Text.Encodings.Web.dll*
drwxr-xr-x 4 root root     80 12月  3 13:26 Views/
-rwxr--r-- 1 root root 151709 12月  3 13:26 WebApplication1.deps.json*
-rwxr--r-- 1 root root 243712 12月  3 13:26 WebApplication1.dll*
-rwxr--r-- 1 root root   1304 12月  3 13:26 WebApplication1.pdb*
-rwxr--r-- 1 root root    182 12月  3 13:26 WebApplication1.runtimeconfig.json*
-rwxr--r-- 1 root root    178 12月  2 17:07 appsettings.json*
drwxr-xr-x 2 root root   4096 12月  3 13:26 refs/
-rwxr--r-- 1 root root    547 12月  3 13:26 web.config*
drwxr-xr-x 6 root root     87 12月  3 13:26 wwwroot/
設定ファイルや依存dllなど、一式が配置されてますね!
参考:
No executable found matching command "bower" #3293
CentOS7 node.jsのインストールメモ - Qiita
How To Install Node.js on a CentOS 7 server | DigitalOcean
実行してみる
実行に必要なファイルが、ぜんぶ書き出されました!ので、試しに実行してみます。
[root@centos7 WebApplication1]# cd /home/webroot/dotnet_sample/bin/
[root@centos7 bin]# systemctl status httpd
● httpd.service - The Apache HTTP Server
   Loaded: loaded (/usr/lib/systemd/system/httpd.service; disabled; vendor preset: disabled)
   Active: active (running) since 土 2016-12-03 13:54:50 JST; 19min ago
     Docs: man:httpd(8)
           man:apachectl(8)
 Main PID: 2738 (httpd)
   Status: "Total requests: 11; Current requests/sec: 0; Current traffic:   0 B/sec"
   CGroup: /system.slice/httpd.service
           tq2738 /usr/sbin/httpd -DFOREGROUND
           tq2739 /usr/sbin/httpd -DFOREGROUND
           tq2740 /usr/sbin/httpd -DFOREGROUND
           tq2741 /usr/sbin/httpd -DFOREGROUND
           tq2742 /usr/sbin/httpd -DFOREGROUND
           tq2743 /usr/sbin/httpd -DFOREGROUND
           tq2760 /usr/sbin/httpd -DFOREGROUND
           tq2795 /usr/sbin/httpd -DFOREGROUND
           tq2796 /usr/sbin/httpd -DFOREGROUND
           mq2797 /usr/sbin/httpd -DFOREGROUND

12月 03 13:54:50 centos7.local systemd[1]: Starting The Apache HTTP Server...
12月 03 13:54:50 centos7.local httpd[2738]: AH00557: httpd: apr_sockaddr_in...l
12月 03 13:54:50 centos7.local httpd[2738]: AH00558: httpd: Could not relia...e
12月 03 13:54:50 centos7.local systemd[1]: Started The Apache HTTP Server.
Hint: Some lines were ellipsized, use -l to show in full.
[root@centos7 bin]# dotnet ./WebApplication1.dll
Hosting environment: Production
Content root path: /home/webroot/dotnet_sample/bin
Now listening on: http://localhost:5000
Application started. Press Ctrl+C to shut down.
ブラウザから見てみます。

おっけーですね!
動作しない?
動作検証時に、正常動作しない現象がありました。
カレントパスがpublish先パスでない場合に、レスポンスが空っぽになります。
[root@centos7 bin]# cd
[root@centos7 ~]# pwd
/root
[root@centos7 ~]# dotnet /home/webroot/dotnet_sample/bin/WebApplication1.dll
Hosting environment: Production
Content root path: /root
Now listening on: http://localhost:5000
Application started. Press Ctrl+C to shut down.
このあとブラウザからアクセスしても、反応がブランクです。
んー?
通信をみてみます...
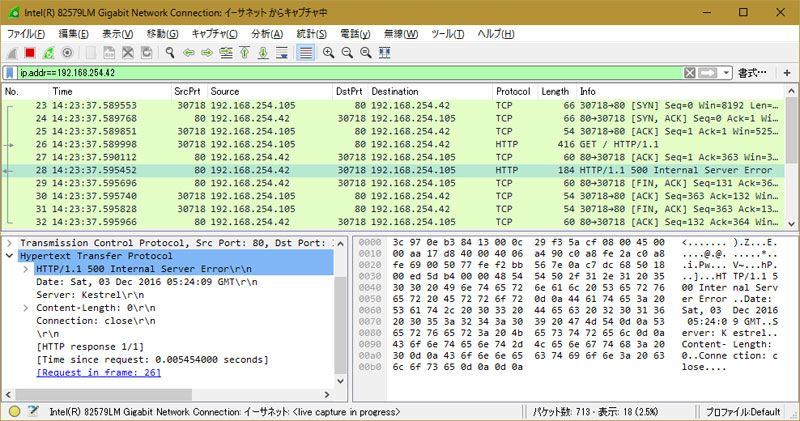
あら。Internal Server Errorですか。
プログラム自体は異常終了してないんですよね。
[root@centos7 ~]# ps -A | grep dotnet
  2856 pts/1    00:00:01 dotnet
というわけで、実行時は publish先のパスに居ないとダメみたいです。
dotnetコマンドのオプションも特に記述が無いので、あとでサービス化するときに、注意が要りますね。
今回分のソースコードはこちら。
まだ、Visual Studioが生成するテンプレートのままです。
github.com