音楽サーバ"Mopidy"のフロントエンドを作る:06 Vue+AdminLTEの導入
音楽サーバ"Mopidy"のフロントエンド「Mopidy.Finder」が出来るまで、第6回です。
今回は、Vue.jsとAdminLTEを導入し、フロントエンドの土台を作ります。
今後しばらく、フロントエンドのお話が中心になる予定です。
Vue.jsの導入
Vue3.x系がまだリリースされていない現在、TypeScriptでVueを書くには、本体のVue.jsに加えてvue-class-component 、vue-property-decoratorを使う方法が主流かと思います。
インストールはお手軽簡単、npm installコマンドで一発です。
# npm install vue vue-class-component vue-property-decorator
ただし、webpackを使う上では少々注意が必要です。
参照するモジュールは、ESモジュールの方を読み込む必要があります。
webpack.config.jsで、下記のようにエイリアスを書きます。
resolve: {
    alias: {
        'vue$': 'vue/dist/vue.esm.js'
    }
}
vue-class-componentの注意点
vue-class-component は、クラスベースのTypeScriptに合わせた記述が出来るように、相当に工夫されています。
しかし、本来はアプローチの異なるVueの機能を後付けでTypeScriptに合わせた仕組みのため、使うにあたって少し注意が必要です。
私の場合、Vueを全く知らない状態からvue-class-component ベースのコードを書き始めたため、下記のような問題にぶち当たりました。
1. コンストラクタで出来ることが限られる
vue-class-componentではVueクラス継承して機能を書いていきます。
しかし、そのコンストラクタの中では、Vueの機能の一部がまだ初期化されていません。
例えば、下記のようなコンポーネントを書いてみます。
コンストラクタと、その少し後で、Vueのプロパティなどを書き出しています。
import Vue from 'vue';
import Component from 'vue-class-component';
import GenreList from './GenreList';
import { Prop } from 'vue-property-decorator'

@Component({
    template: `<section class="content">
    <div class="row">
        <genre-list ref="GenreList" />
    </div>
</section>`,
    components: {
        'genre-list': GenreList
    }
})
export default class Finder extends Vue {

    private get GenreList(): GenreList {
        return this.$refs.GenreList as GenreList;
    }

    @Prop()
    public testProp?: string;

    public testData: string = 'hello?';

    public constructor() {
        super();

        console.log('--- On Constructor ---');
        this.Dump();

        setTimeout(() => {
            console.log('--- After Constructor ---');
            this.Dump();
        }, 10);
    }

    private Dump(): void {
        console.log('this.$data:\r\n' + JSON.stringify(this.$data, this.Replacer, 4));
        console.log('this.$props:\r\n' + JSON.stringify(this.$props, this.Replacer, 4));
        console.log('this.$on:\r\n' + JSON.stringify(this.$on, this.Replacer, 4));
        console.log('this.$emit:\r\n' + JSON.stringify(this.$emit, this.Replacer, 4));
        console.log('this.$refs:\r\n' + JSON.stringify(this.$refs, this.Replacer, 4));
        console.log('this.$el:\r\n' + JSON.stringify(this.$el, this.Replacer, 4));
    }

    private Replacer(key, value): any {
        const valueType = typeof value;

        if (valueType === 'function')
            return 'function';

        if (valueType === 'object') {
            let result = '{ ';
            for (let i in value) {
                result += `${i}: ${value[i]}, `
            }
            result += '}';

            return result;
        }

        return value;
    }
}
これを実行してみると、どんな結果になるかというと:
const finder = new Finder();
finder.$mount('#root');
--- On Constructor ---
this.$data:
undefined
this.$props:
"{ testProp: undefined, }"
this.$on:
"function"
this.$emit:
"function"
this.$refs:
"{ }"
this.$el:
undefined
--- After Constructor ---
this.$data:
"{ initialized: false, testData: hello?, }"
this.$props:
"{ testProp: undefined, }"
this.$on:
"function"
this.$emit:
"function"
this.$refs:
"{ GenreList: [object Object], }"
this.$el:
"{ _prevClass: content, __vue__: [object Object], title: , lang: , translate: .....
コンストラクタの中では、
$propsは取得出来ているものの、$refsは空オブジェクト$elはundefined
な状態です。
$refsや$elは、$mountが実行されて初めて生成されるオブジェクトのため、コンストラクタ時点では扱うことが出来ない仕組みなんですね。
2. クラス変数名にプレフィクス'_'を使うことが出来ない
例えば、下記のようにクラス変数に'_message'を持つ下記のようなコード。
import Component from 'vue-class-component';
import Vue from 'vue';

@Component({
    template: `<section class="content">
    <div class="row">
        {{ Message }}
    </div>
</section>`
})
export default class TestView extends Vue {

    private _message: string = 'hello?';

    public get Message(): string {
        return this._message;
    }
}
このコードは、テンプレート{{ Message }} の箇所に何も表示しません。
これはVue本来の仕様通りで、公式ドキュメントで下記のように記載されています。
Vue の内部的なプロパティや API メソッドと衝突する可能性があるため、
_ または $ から始まるプロパティは Vue インスタンスにプロキシされない
ことに注意してください。
基本的に使用禁止、としておいた方が無難です。
3. スーパークラスのメソッドをイベントハンドル出来ない
正確には、ハンドル自体は動くのですが、this参照がnullになります。
例えば、こんなスーパークラスを作ります。
import Vue from 'vue';

export default abstract class ViewBase extends Vue {
    public constructor(options?: any) {
        super(options);
    }

    public OnClicked(): void {
        this.InnerOnClicked();
    }

    private InnerOnClicked(): void {
        console.log('hello?');
    }
}
そして、スーパークラスを継承したサブクラスを作り、イベントを書きます。
import ViewBase from '../Bases/ViewBase';
import Component from 'vue-class-component';

@Component({
    template: `<section class="content">
    <div class="row" @click="OnClicked"> <!-- clickイベントをハンドル -->
        {{ Message }}
    </div>
</section>`
})
export default class SubView extends ViewBase {

    private message: string = 'hello?';

    public get Message(): string {
        return this.message;
    }
}
そして、メッセージ部分をクリックすると...
[Vue warn]: Error in v-on handler: "TypeError: Cannot read property 'InnerOnClicked' of null"

(found in <Root>)
TypeError: Cannot read property 'InnerOnClicked' of null
    at ViewBase.OnClicked (ViewBase.ts:14)
    at invokeWithErrorHandling (vue.esm.js:1863)
    at HTMLDivElement.invoker (vue.esm.js:2188)
    at HTMLDivElement.original._wrapper (vue.esm.js:7559)
うそーん。
'InnerOnClicked' of nullて、nullの中でInnerOnClickedメソッドを探してる?
Visual Studioでブレイクしてみると。

基底クラス側のthisが、nullになってしまっています。
そのため、this.InnerOnClickedメソッドが見えないわけですね。
こんな場合は、サブクラス側で一旦ハンドルしてからスーパークラスを呼びます。
export default class SubView extends ViewBase {

    private message: string = 'hello?';

    public get Message(): string {
        return this.message;
    }

    public OnClicked(): void { // ここでハンドル
        super.OnClicked();
    }
}
他にも、触っていて「んー?」となる箇所が所々見受けられました。
vue-class-componentを使う際は、先にある程度書き慣らしてナレッジを積み重ねた方が良いように思います。
TypeScriptネイティブになるという、Vueバージョン3が待ち遠しいですね!
そしてAdminLTE...ってなに?
次に、AdminLTEを導入するのですが...。
導入の時点では、私はAdminLTEについて、殆ど何も知りませんでした。
「どうやら管理画面がお手軽に出来るブツらしい」程度の認識です。
AdminLTEをぐぐってみると、公式デモページが2つ並んでいました。
2019年8月現在の今も、同じですね。

どうやら、バージョン2系と3系があるようです。
違いは何なのか、調べてみると。
こんな記事が見つかりました。
minory.org
ほうほう、Bootstrapのバージョンが4になった、と。
Bootstrap4は、私はまだ触ったことがありませんでした。
調べてみると、従来のBootstrap3までとは大きく変わったようです。
AdminLTEはよく知りませんが、Bootstrapは今までも色んな案件でお世話になりました。
その新しいバージョンは、先だって試しておいて損はないでしょう。
ということで、今回はAdminLTEのバージョン3系を導入することにしました。
AdminLTEの導入
npmでadmin-lteをsearchすると、現在のバージョンが2.4だ、と出てきます。
# npm search admin-lte

バージョン3系はまだプレリリース版なんですね。
どんなバージョンがあるのか、調べてみます。
# npm info admin-lte versions

2019年8月7日現在で調べると、3.0.0-beta.2まで出ています。
が、私が導入した際はまだ3.0.0-beta.1までしかありませんでした。
その3.0.0-beta.1が入った状態を、再現してみます。
# npm install admin-lte@3.0.0-beta.1
どんなブツが入ったか、というと。

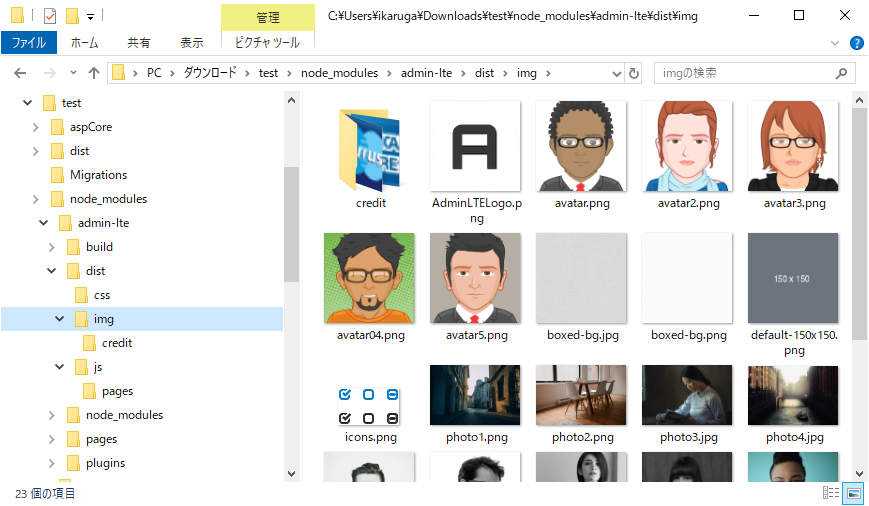

ほうほう。imgフォルダはデモ用の画像っぽいので、スルーしてよさげ。
dist/css/adminlte.cssと、dist/js/adminlte.jsを読んでおけばよい感じです。
AdminLTEの導入で間違える
VueとAdminLTEを試していたのが、この頃のコミットです。
ここで私は、愚かな間違いを犯します。
AdminLTEのプラグインフォルダを見ると。

bootstrapを始め、有名な実装がたんと詰まっています。
中でも Ion.RangeSlider は、見た目もかっこいいし、音楽プレイヤーのボリューム調整パーツに使えそうです。
そしてそれは、jQueryプラグインらしい、と。
そこで、私はjQueryを単体でインストールしました。
この時点での、package.jsonのdependenciesはこちら。
"dependencies": {
    "admin-lte": "^3.0.0-beta.1",
    "animate.css": "^3.7.2",
    "axios": "^0.19.0",
    "es6-promise": "^4.2.8",
    "font-awesome": "^4.7.0",
    "jquery": "^3.4.1",
    "linq": "3.1.1",
    "lodash": "^4.17.11",
    "qs": "^6.7.0",
    "requirejs": "^2.3.6",
    "vue": "^2.6.10",
    "vue-class-component": "^7.1.0",
    "vue-property-decorator": "^8.2.1"
}
これが、この後5日間に渡り私の頭を悩ませる原因となりました。
何が間違いだったか、というと。
AdminLTEをimportしたとき、それにつられてnode_modules/admin-lte/plugins/jquery/jquery.jsが、一緒に読み込まれます。
そして、別途単体でもjQueryをimportしています。
2つのjQueryが個別に存在する、という状況を作ってしまったため、「組み込んだはずのプラグインのメソッドが呼び出せない」という現象に悩まされることとなりました。
これを解決するには!
まず単体でインストールしたjQueryを削除します。
その上で、webpack.config.jsで、jQueryのエイリアスとパスを指定してやります。
webpack.config.prod.js
// -- 一部抜粋 --
resolve: {
    alias: {
        // Admin-LTE側のJQueryを読ませる。
        'jquery': 'admin-lte/node_modules/jquery/dist/jquery.js',
        'vue$': 'vue/dist/vue.esm.js'
    }
},
plugins: [
    new webpack.ProvidePlugin({
        $: 'jquery',
        jQuery: 'jquery'
    })
]
こんな感じですね。
UIパーツのコードを書く
さてさて、ライブラリのインストールが終わったところで!
実際にVueとAdminLTEを使った、UIのコードを見ていきます。
まずはVueを使った基底クラス、ViewBaseを作りました。
src/ts/Views/Bases/ViewBase.ts
import Vue from 'vue';
import * as _ from 'lodash';

export default abstract class ViewBase extends Vue {

    private initialized: boolean = false;

    public constructor(options?: any) {
        super(options);
    }

    public async Initialize(): Promise<boolean> {

        if (this.initialized)
            return true;

        const promises: Promise<boolean>[] = [];
        _.each(this.$children, (view) => {
            if (view instanceof ViewBase)
                promises.push((view as ViewBase).Initialize());
        });

        await Promise.all(promises);

        return true;
    }
}
コンストラクタでは何も出来ないため、初期化用のメソッドInitializeを作ります。
サブクラスでInitializeをoverrideしてイベント定義やらを書くつもりです。
そして、全てのViewのルートとなるRootViewを作ります。
src/ts/Views/RootView.ts
import ViewBase from './Bases/ViewBase';
import Sidebar from './Sidebars/Sidebar';
import Finder from './Finders/Finder';

export default class RootView extends ViewBase {

    public constructor() {
        super({
            template: `<div class="wrapper" style="height: auto; min-height: 100%;">
    <sidebar ref="Sidebar" />
    <div class="content-wrapper" style="height: 100%">
        <section class="content-header">
            <h1 ref="ContentTitle">{{ contentTitleString }}</h1>
        </section>
        <finder ref="Finder" />
    </div>
</div>`,
            components: {
                'sidebar': Sidebar,
                'finder': Finder
            }
        });
    }

    private contentTitleString: string = 'Finder';
}
ん?なんでコンストラクタ引数にテンプレート類を渡してるんだろう?
こんなことも出来るよ、というテストがしたかったのかな?
特に意味は無く、これは後にvue-class-componentベースで書き直しています。
サイドバーはまだ見た目だけなので、割愛。
コンテンツ部にFinderというViewを作っています。
src/ts/Views/Finders/Finder.ts
import ViewBase from '../Bases/ViewBase';
import Component from 'vue-class-component';
import GenreList from './GenreList';

@Component({
    template: `<section class="content">
    <div class="row">
        <genre-list ref="GenreList" />
    </div>
</section>`,
    components: {
        'genre-list': GenreList
    }
})
export default class Finder extends ViewBase {

    private get GenreList(): GenreList {
        return this.$refs.GenreList as GenreList;
    }
}
これも、ただの入れ物ですね。
入れ物の中身、GenreListはというと。
src/ts/Views/Finders/GenreList.ts
import ViewBase from '../Bases/ViewBase';
import Component from 'vue-class-component';
import GenreStore from '../../Models/Genres/GenreStore';
import SelectionItem from '../Shared/SelectionItem';
import Genre from 'src/ts/Models/Genres/Genre';

@Component({
    template: `<div class="col-md-3">
    <div class="card">
        <div class="card-header with-border bg-green">
            <h3 class="card-title">Genre</h3>
            <div class="card-tools">
                <button type="button"
                        class="btn btn-tool"
                        @click="OnClickRemove" >
                    <i class="fa fa-remove" />
                </button>
            </div>
        </div>
        <div class="card-body">
            <ul class="nav nav-pills flex-column">
            <template v-for="genre in genres">
                <selection-item
                    ref="Items"
                    v-bind:entity="genre"
                    @click="OnClickItem" />
            </template>
            </ul>
        </div>
    </div>
</div>`,
    components: {
        'selection-item': SelectionItem
    }
})
export default class GenreList extends ViewBase {

    private genreStore: GenreStore = new GenreStore();
    private genres: Genre[] = [];

    public async Initialize(): Promise<boolean> {
        await super.Initialize();

        this.genres = (await this.genreStore.GetList())
            .orderBy(e => e.Name)
            .toArray();

        return true;
    }

    private OnClickRemove(): void {

    }

    private OnClickItem(): void {

    }
}
ロジックらしいロジックが、初めて出てきました。
Viewbaseで書いておいたInitializeメソッドを、ここでoverrideしています。
ジャンルのStoreからリストを貰っています。
GetListの戻り値をlinq.jsでEnumerable化しているため、ここで名前順に並べ替えるメソッドを試していますね。
そして、クラス変数genresにセットしたGenre型の配列を、v-forでループして描画しています。
さて、どんな絵面になるでしょう...?
これを描画してみると。
const root = new RootView();
root.$mount('#root');
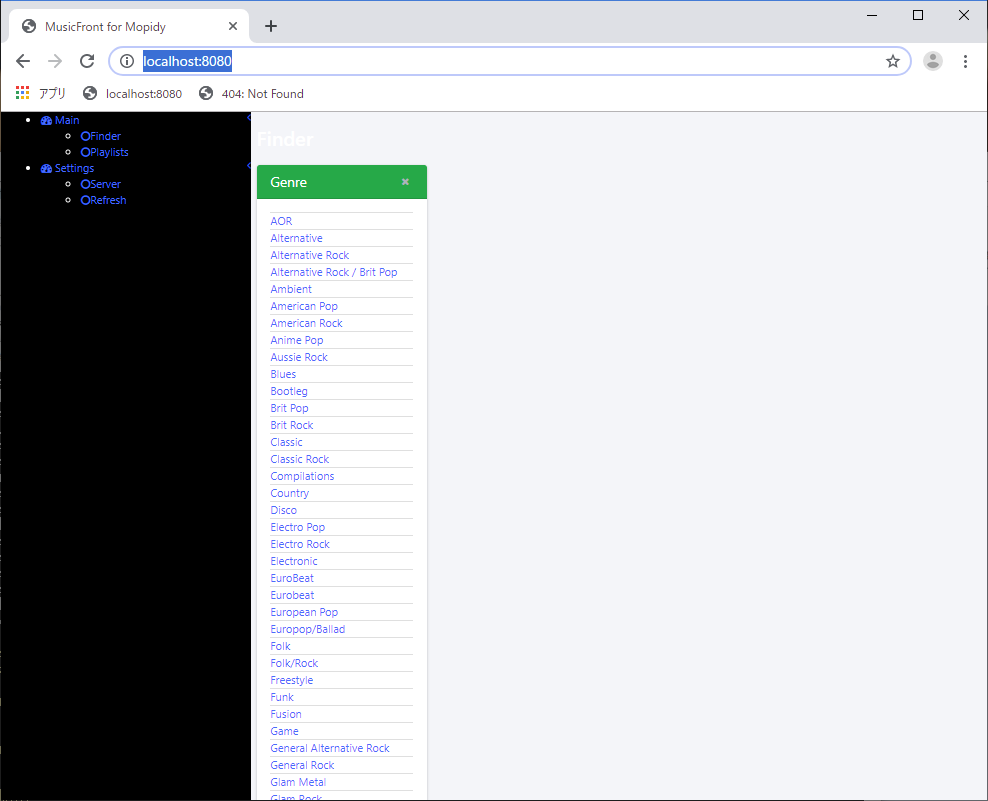
うおー。めっちゃ縮小されとる!
しかしどうやら、ジャンルの一覧が名前順に出てきてるようです。
UIの第一歩としては、上々です!